Social Media
How To Find & Cancel Pending Facebook Friend Requests
If you want to find and cancel all the pending Facebook friend requests that you’ve sent, our step-by-step guide will show you how.

Facebook is helping people connect in a lot of different ways. Some use it to keep in touch with former classmates, others use it for work, and there are also many people who visit the social network just to read the latest news and look at funny cat pictures. As such, you’re guaranteed to encounter some people who are less than thrilled to become your friends by accepting your Facebook friend requests. In this article, we explain where you can find all pending Facebook friend requests so that you can cancel them and stop them from reminding you that not everyone wants to be your friend.
What Are Facebook Friend Requests?
Facebook is all about connecting with friends and family members. This is done using friend requests. You can send a friend request to any Facebook user with a simple click. If the user decides to accept your request, you will be able to see the user’s activity in News Feed, Stories, and Photos, and the user will see yours.
However, the user may also choose to decline or simply ignore your friend request. If they choose the last option mentioned, your friend request will remain pending indefinitely — or until you manually cancel it. The good news is that you can send an unlimited number of friend requests, so keeping them pending isn’t a huge deal.
How To Find Pending Facebook Friend Requests
Finding pending Facebook friend requests is just as simple on a computer as it is as on a smartphone:
Computer
Step 1: Open a web browser and log in to your Facebook profile.
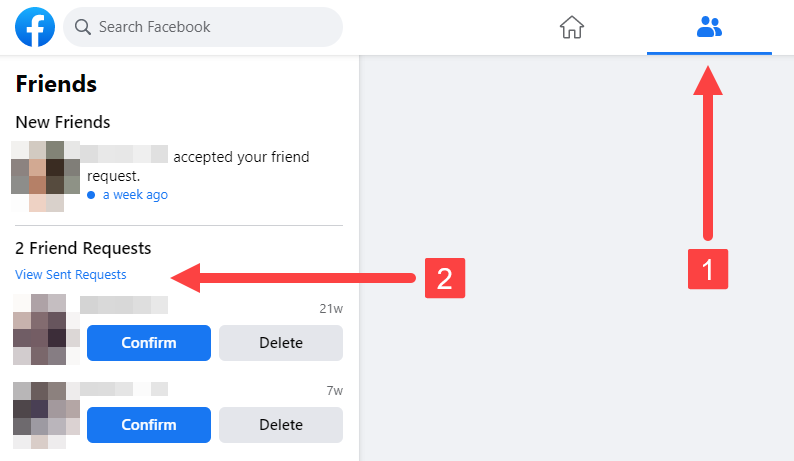
Step 2: Click the “Friends” button in the left side panel.
Step 3: Click “View Sent Requests” below Friend Requests.
Smartphone
Step 1: Open the Facebook app on your Android or iOS smartphone.
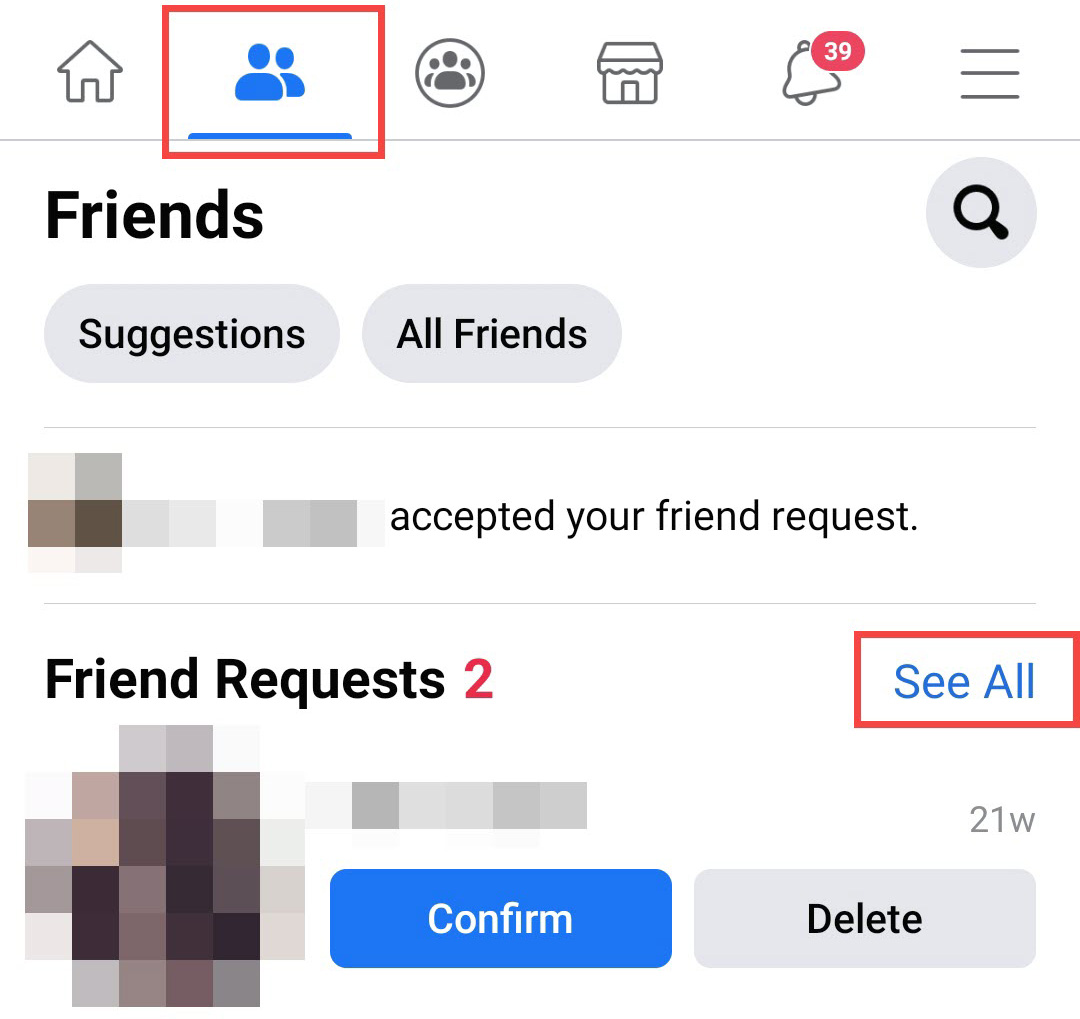
Step 2: Tap the “Friends” icon located in the top menu.
Step 3: Tap “See All” next to “Friend Requests”.
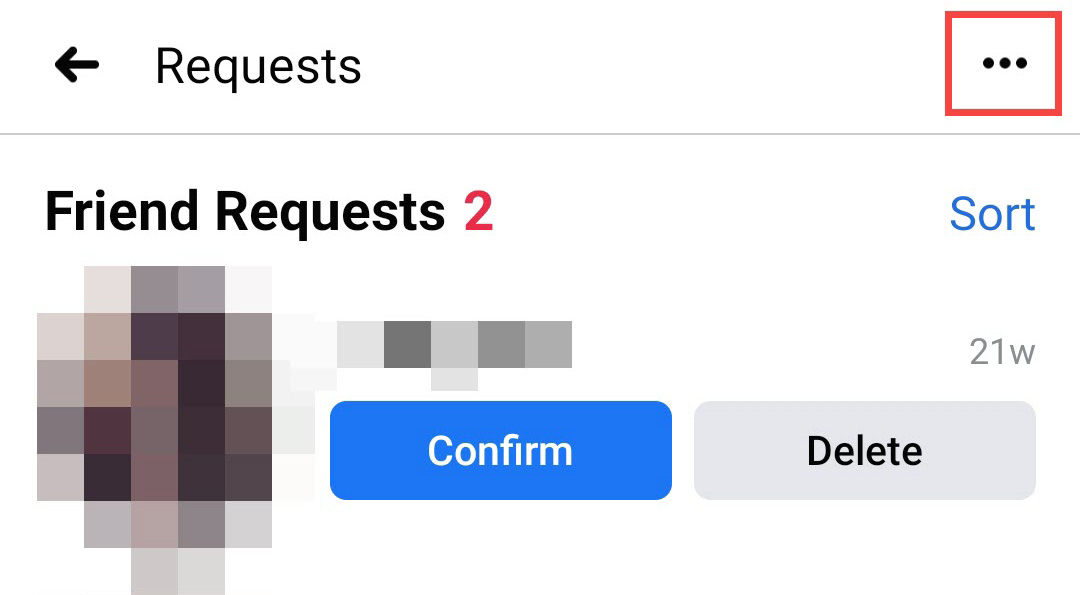
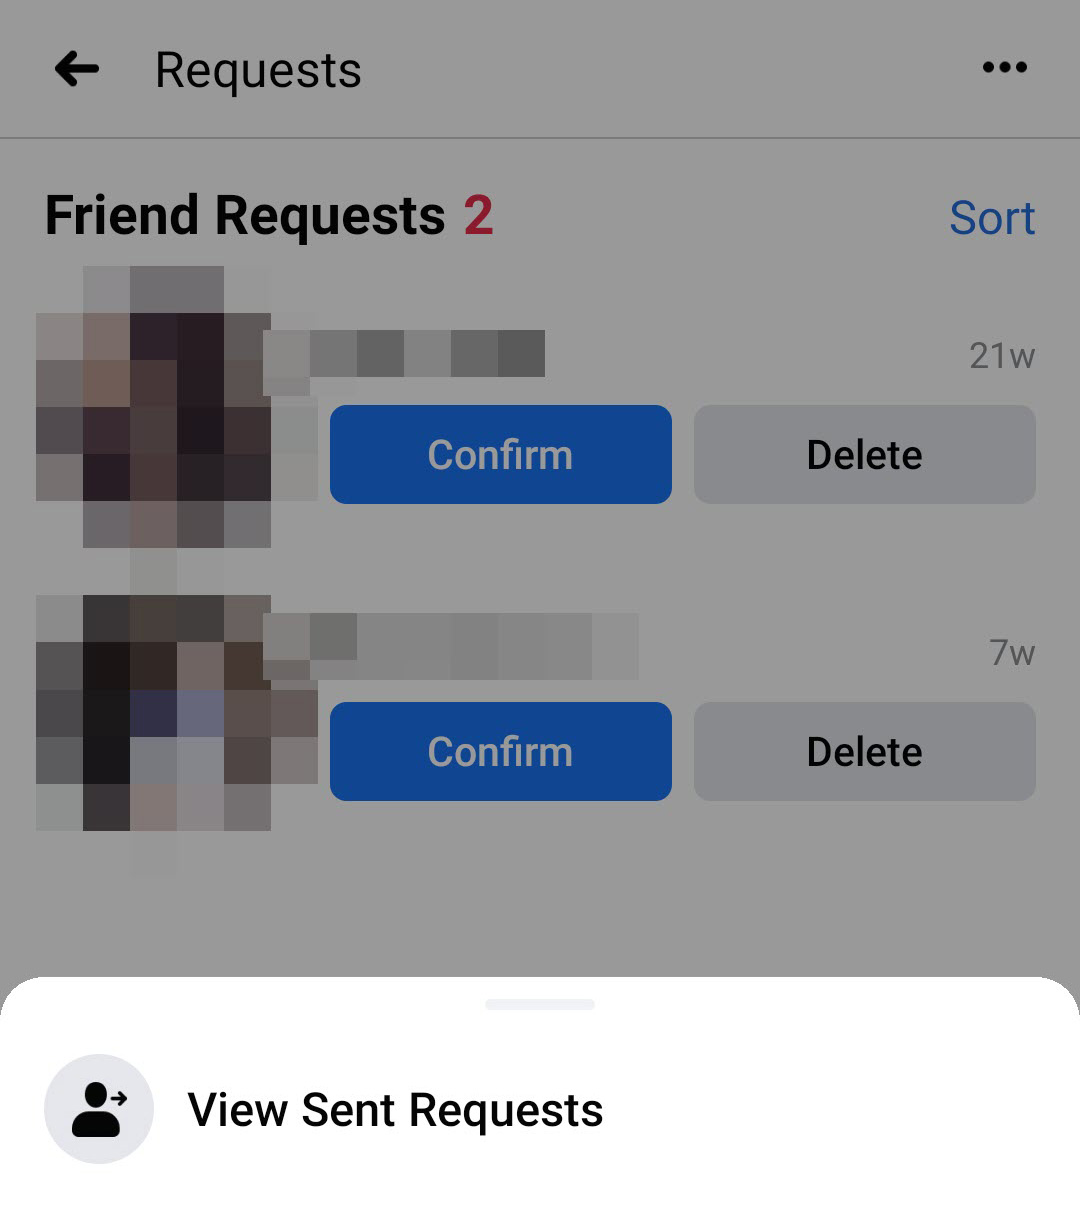
Step 4: Tap the three dots in the top-right corner.
Step 5: Select “View Sent Requests”.
How To Cancel Pending Facebook Friend Requests
Facebook makes it possible to cancel pending friend requests without notifying their recipients. Here’s what you need to do:
Computer
Step 1: Open a web browser and log in to your Facebook profile.
Step 2: Click the “Friends” button in the navigation bar or in the left side panel.
Step 3: Click “View Sent Requests” below “Friend Requests”.

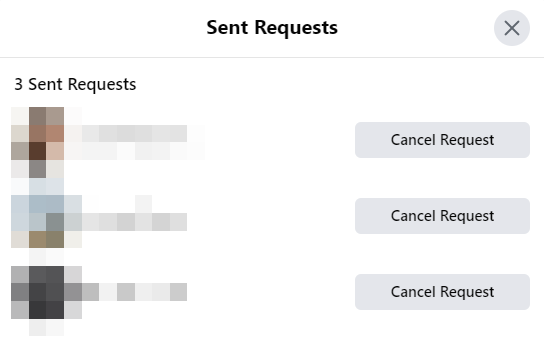
Step 4: Click “Cancel Request” next to the friend request you want to cancel.

Smartphone
Step 1: Open the Facebook app on your Android or iOS smartphone.
Step 2: Tap the “Friends” icon located in the top menu.
Step 3: Tap “See All” next to “Friend Requests”.

Step 4: Tap the three dots in the top-right corner.

Step 5: Select “View Sent Requests”.

Step 6: Click “Cancel Request” next to the friend request you want to cancel.
Read Now: How To Find & Cancel Pending Instagram Requests
Alternatively, you can visit the profile of any person who received a friend request from you but hasn’t accepted it yet, and you should see the “Cancel Request” button under their profile picture.
Did this guide help you find and cancel all your pending Facebook friend requests?