Social Media
How To Find & Cancel Pending Instagram Requests
This step-by-step guide will show you how to find and cancel all those pending Instagram requests that people have ignored.

Accidentally sending a follow request to the wrong person on Instagram can be a potentially embarrassing mistake. As these mistakes rack up over time, you could eventually find yourself with dozens of unapproved follow requests. The good news is that Instagram allows you to cancel pending follow requests as long as you meet one obvious condition: The person you’ve sent the request to has not accepted or declined it yet.
How To Find Pending Instagram Requests
Unfortunately, the Instagram app (or the website) doesn’t offer a direct way to view pending follow requests. That said, users have two alternative options: a quick but potentially unreliable method, and a more comprehensive but time-consuming approach.
The quick method involves checking your search history for recently requested profiles:
- Tap the magnifying glass icon at the bottom of the Instagram app.
- Tap the search bar at the top.
- Tap See all to view your search history.
- Look for profiles with a Requested button.
This method is fast but limited. It only shows recent searches and won’t work if you’ve cleared your search history. The good news is that there’s also a clever workaround that lets you dig up all your pending follow requests by downloading your Instagram data. Here’s what you need to do:
Step 1: Access Your Instagram Account Center
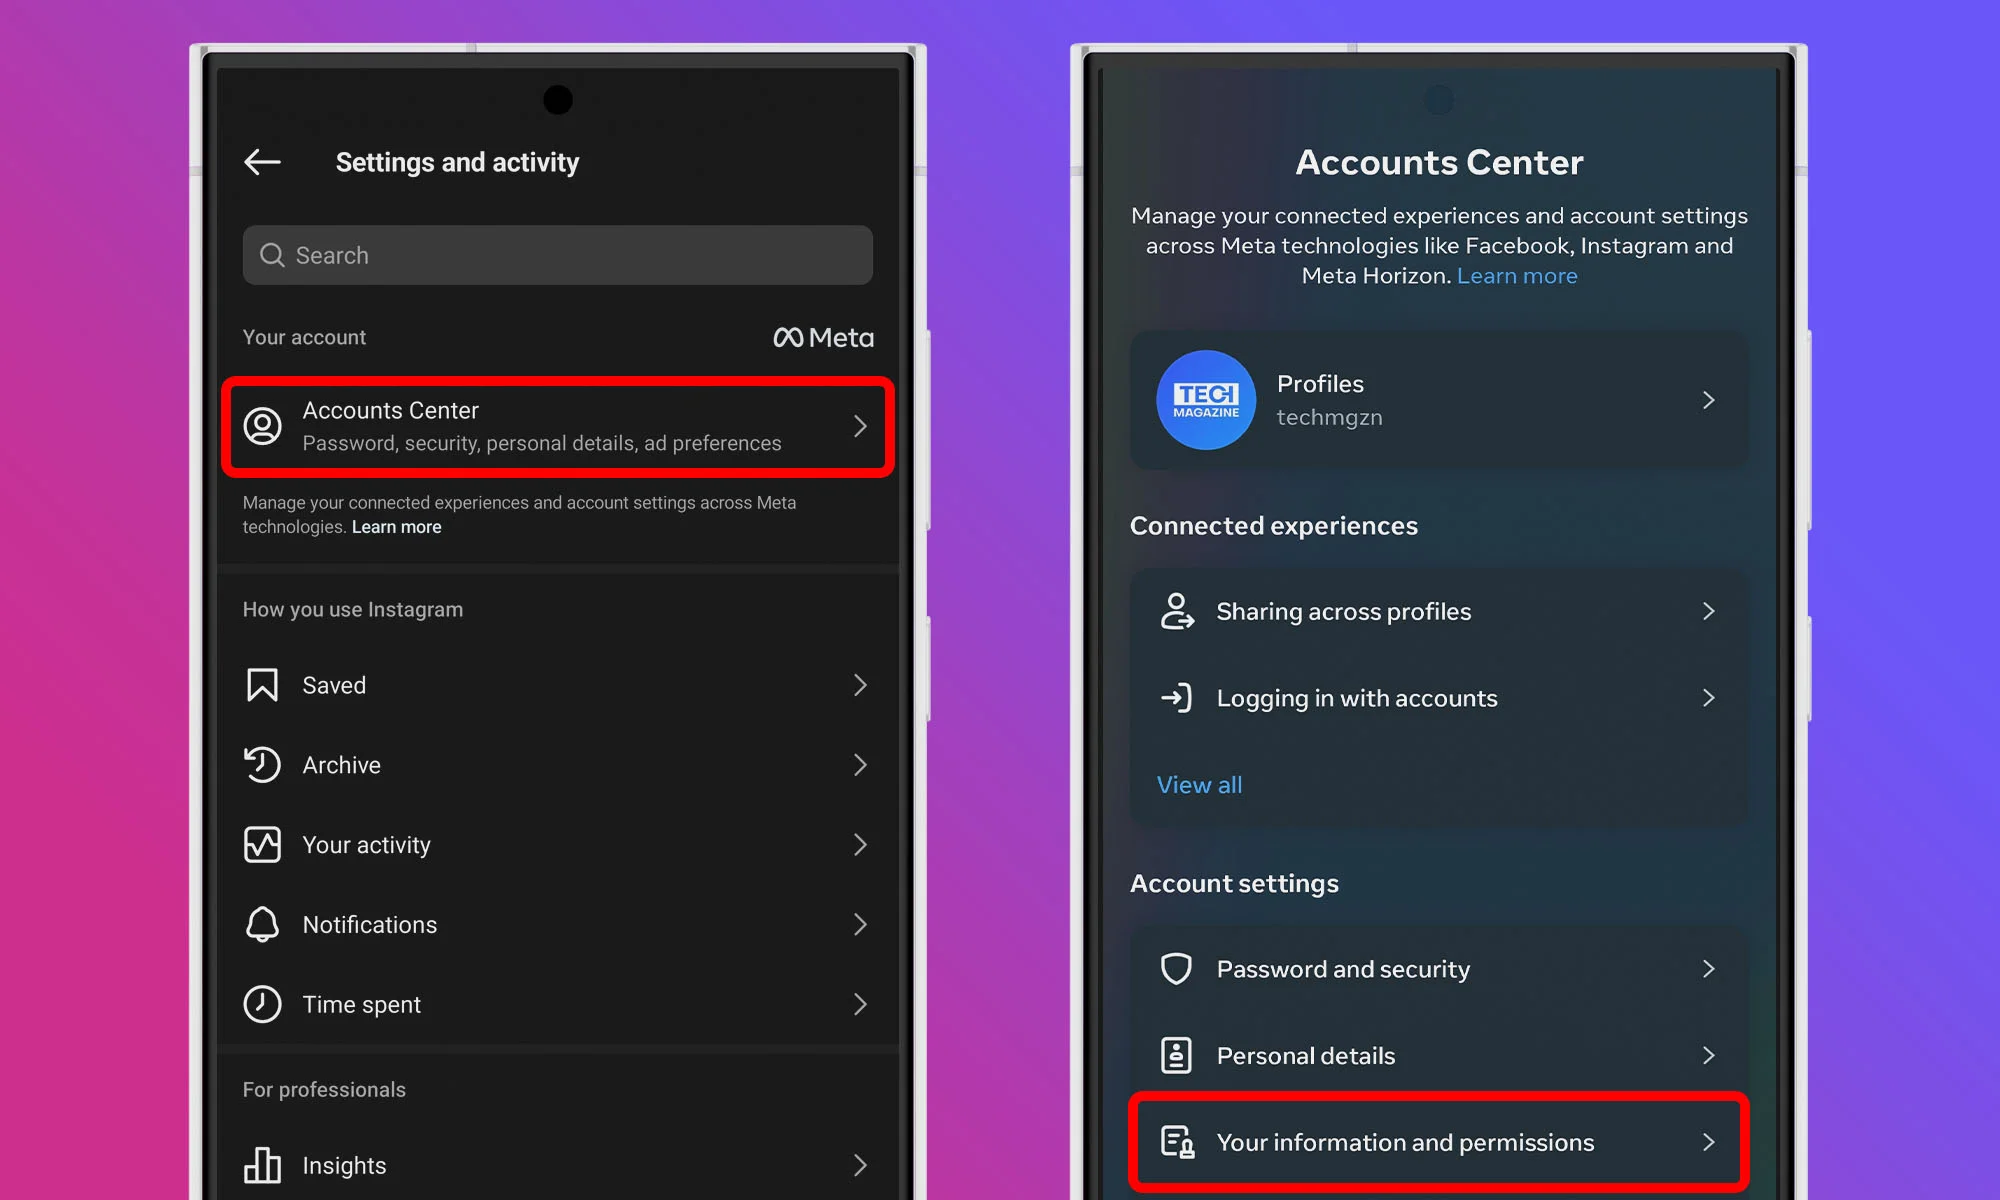
Start by opening the Instagram app on your mobile device and navigating to your profile by tapping your profile picture icon at the bottom right corner. Once you’re on your profile page, tap the three horizontal lines at the top right to open the menu. From there, select Account Center at the top of the list. Within the Account Center menu, navigate to the Your information and permissions section. There, select Download your information.
Step 2: Request A Download Of Your Information
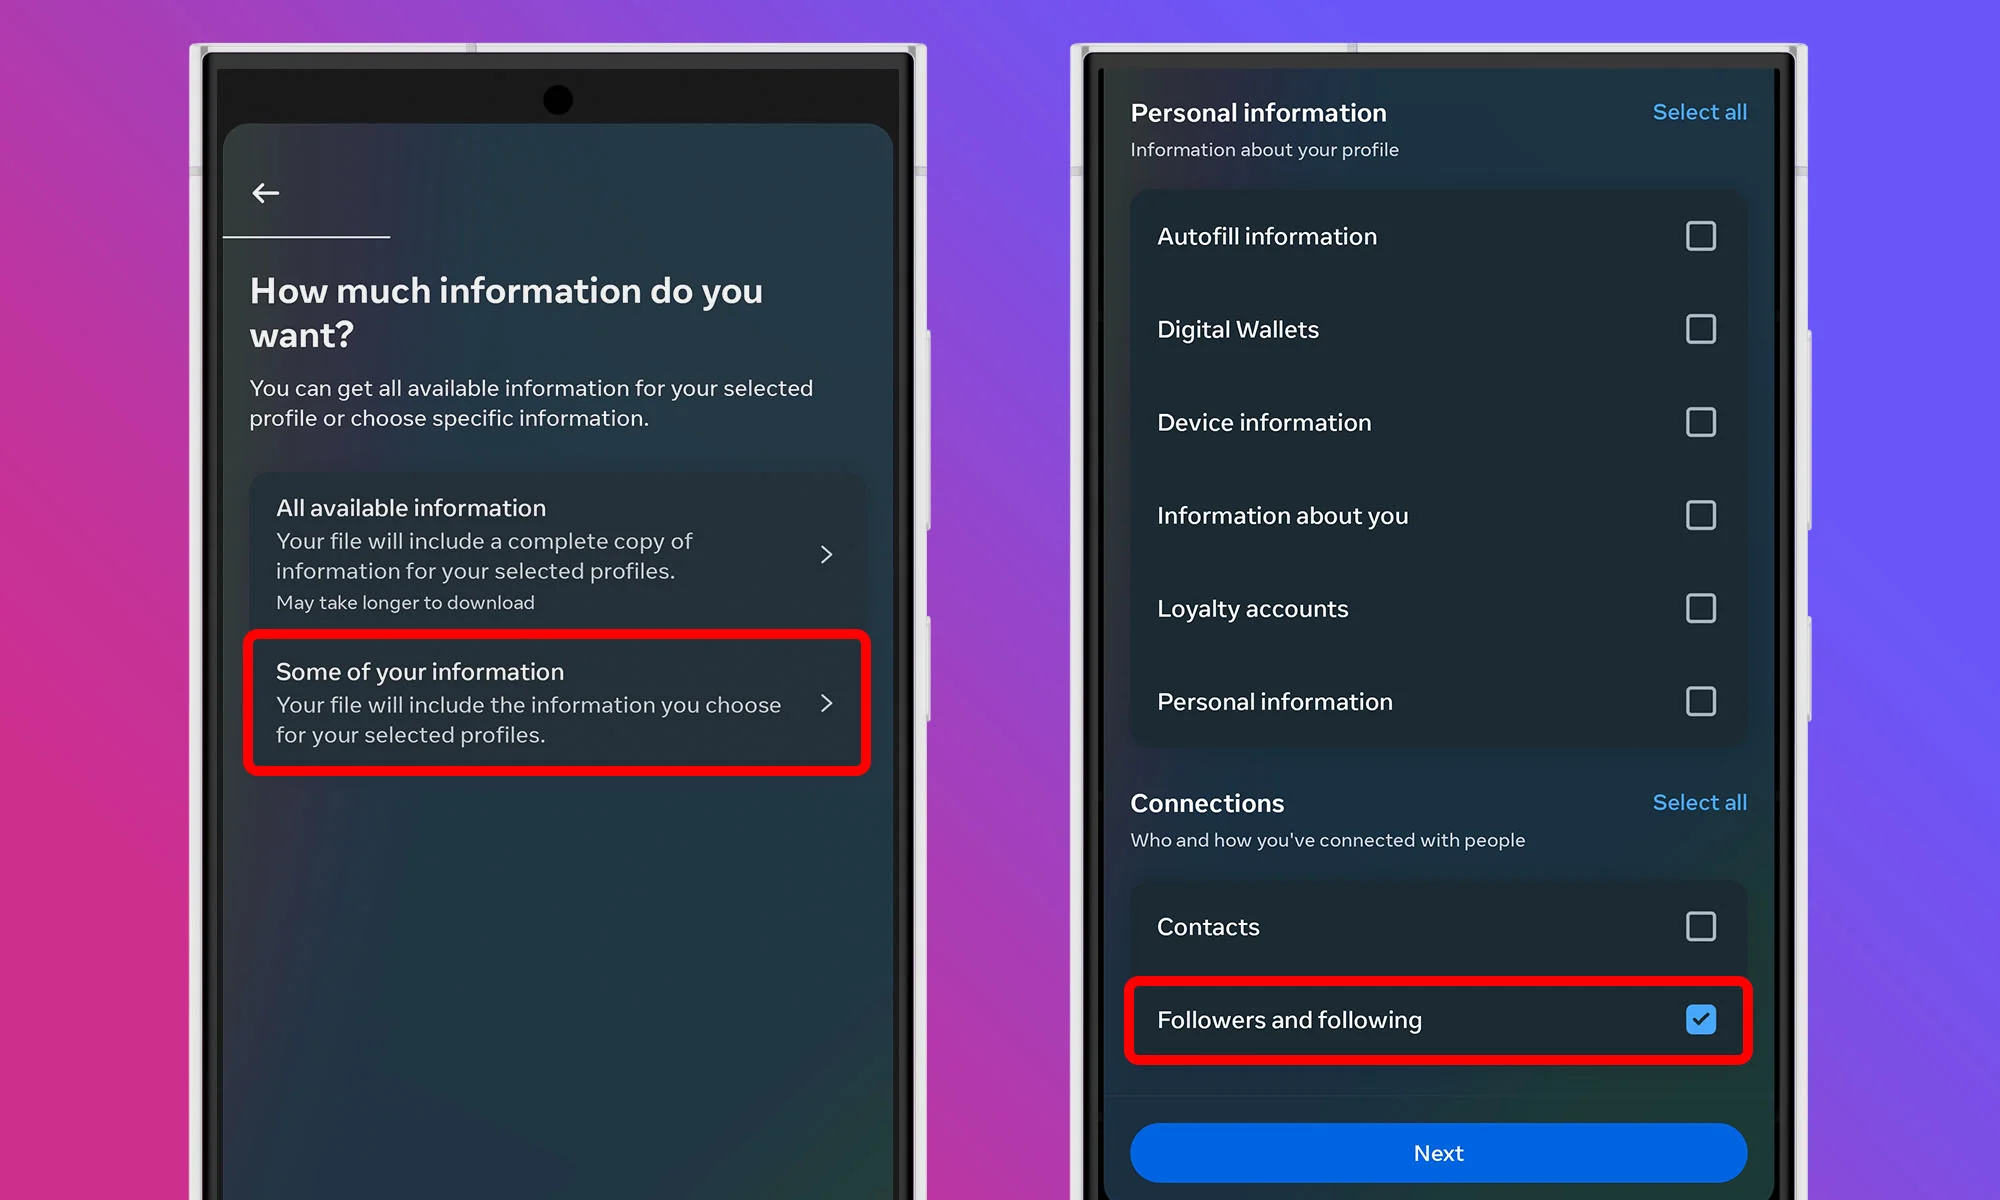
The Download your information feature allows you to request a copy of all the data Instagram has collected about your account. Don’t worry — this is a standard feature designed to give users control over their own data. Tap the Download or transfer information button. When asked how much information you want to download, select the Some of your information option. In the list that appears, find the Connections section and check the box next to Followers and following. This way, you’ll receive only relevant data.
Step 3: Set A Date Range And Submit Your Request
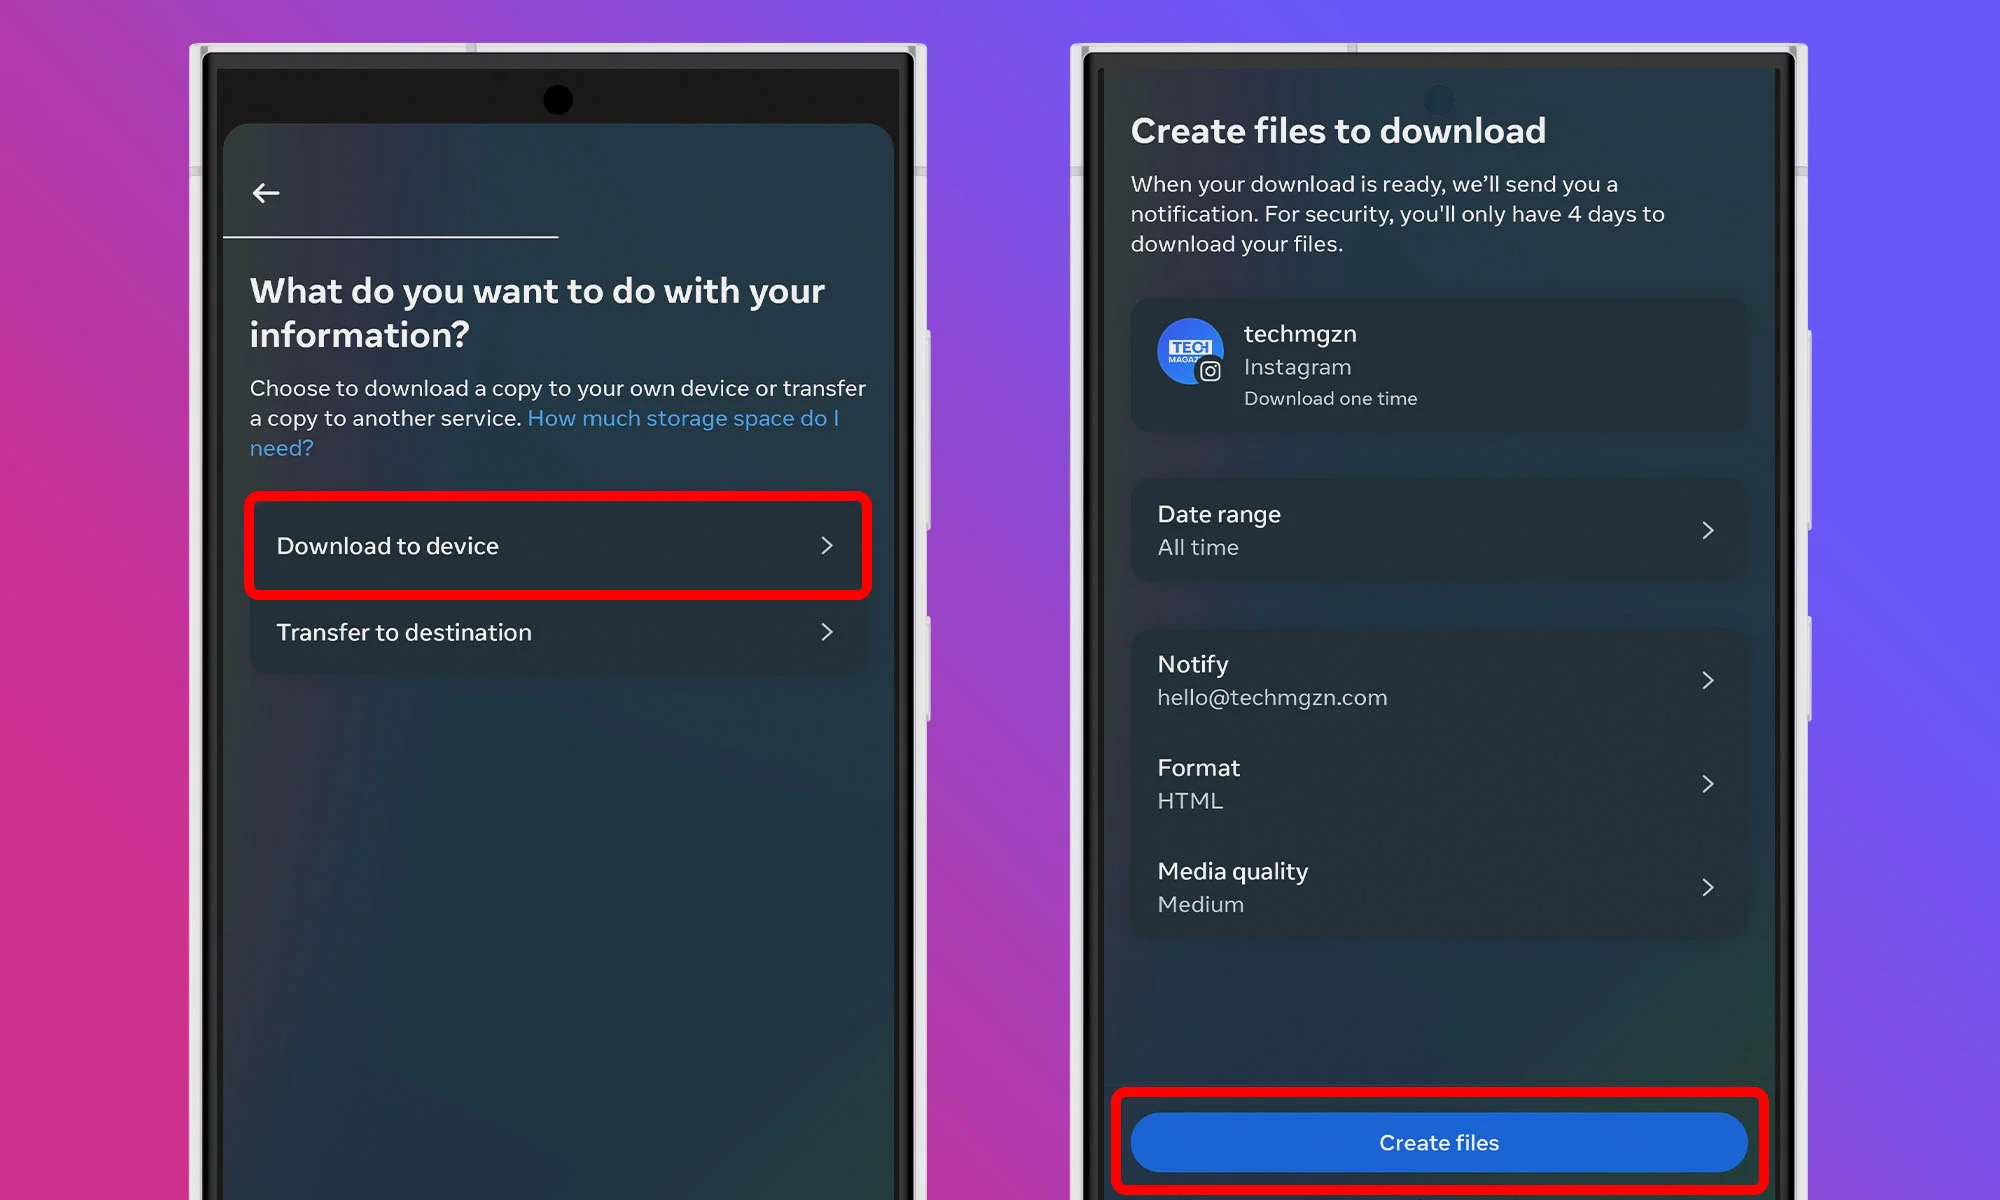
After selecting the data type, tap Next and choose to download the data to your device. You’ll have the option to set a Date range. If you want to see all pending requests since you joined Instagram, choose All time. Otherwise, select a specific time frame that suits your needs. Once you’ve made your selection, tap on Create files. Instagram will begin compiling your data.
Step 4: Wait For The Download Link
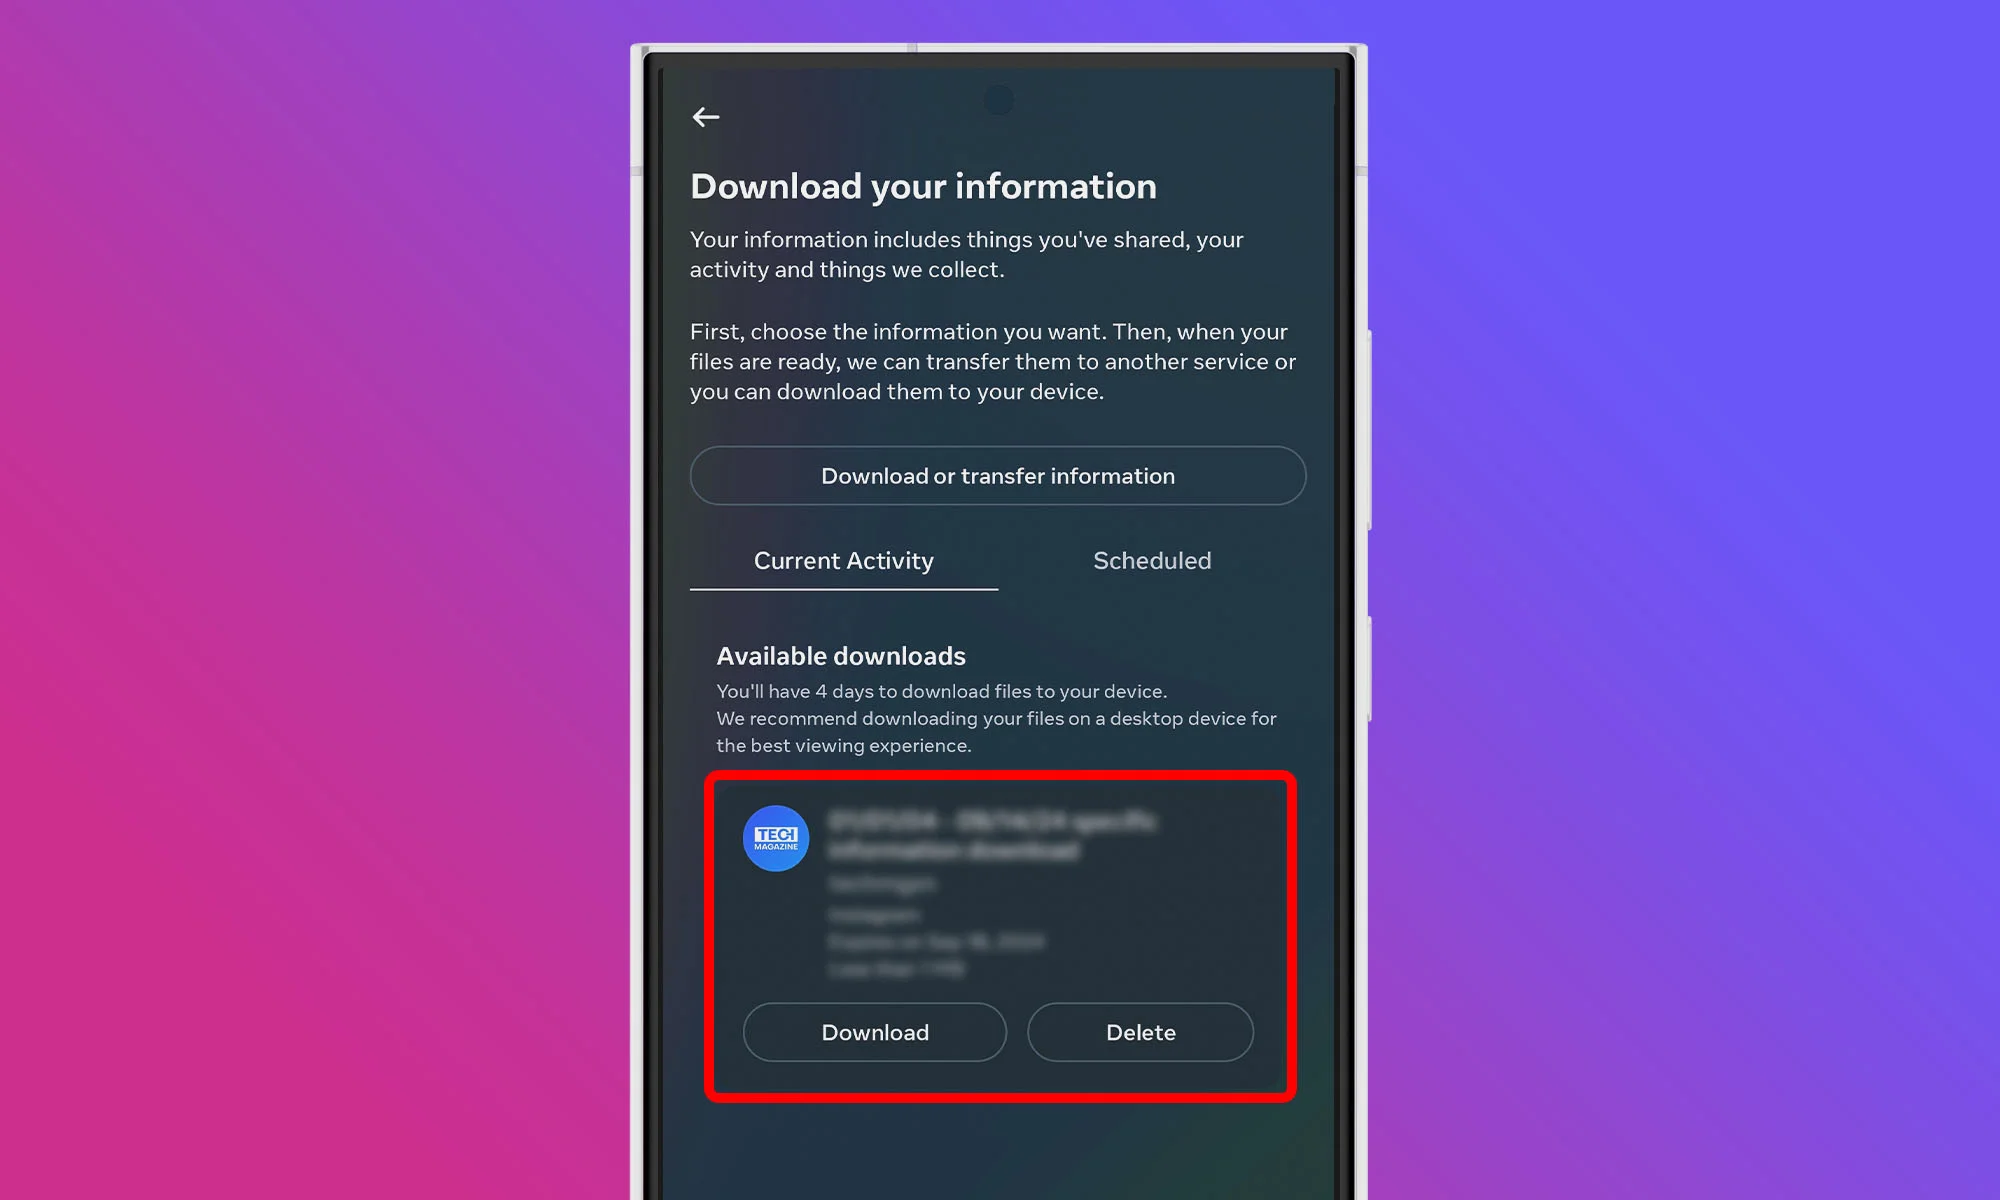
Instagram will process your request and send a download link to your registered email address. This might take anywhere from a few minutes to up to 48 hours, depending on the amount of data. Keep an eye on your inbox for an email titled “Your Instagram information“. Once it arrives, click on the Download information link provided in the email. You can do this on your mobile device.
Step 5: Extract Your Instagram Data
Your Instagram data will be downloaded as a ZIP file, and you need to use a file manager or extraction tool to extract its contents. You can now open the extracted folder using a File Manager (the Files app on iOS works nicely), look for a file named “start_here.html” and open it in your web browser. Find and click on Pending follow requests, and voilà! You’re now looking at a comprehensive list of all the follow requests you’ve sent that are still in limbo.
How To Cancel Sent Instagram Requests
Now that you’ve unearthed your pending follow requests, it’s time to clean house. Unfortunately, Instagram doesn’t offer a one-click solution to cancel all your pending requests at once, so expect the process to take a while, especially if you’ve sent a lot of follow requests.
Step 1: Locate User Profiles
For each pending request you want to cancel in the Pending follow requests section of the “start_here.html”, you’ll need to locate the user’s profile on Instagram. The quickest way to do this is by copying the username from your downloaded list and pasting it into the Instagram search bar. Once you’ve found the account, tap to enter their profile.
Step 2: Cancel The Follow Request
Look for the Requested button on their profile. This button is your target. When you tap it, it should immediately transform back into a blue Follow button. This visual change confirms that you’ve successfully cancelled your follow request.
Step 3: Repeat The Process
Now, rinse and repeat this process for each pending request you want to cancel. As you go through this process, you might find some accounts you still want to follow. In that case, simply leave the Requested button as is. Who knows? They might accept your request someday.
Also Read: How To Permanently Delete Your Instagram Account
As you can see, finding and cancelling Instagram follow requests isn’t complicated – you just need to know where to look. If you found this guide useful, let us know in the comments below. Also, make sure to follow us on Instagram!


Social Media
Threads: Everything You Should Know About The Twitter Alternative
Discover Threads, the new microblogging platform by Meta that’s set to redefine the social media landscape and present an innovative alternative to Twitter.
Remember when Myspace was the ruler of the social media realm? At the time, it seemed unimaginable that another platform could usurp its throne. Yet, the social media landscape is dynamic, always ready to surprise us with the next big thing. Now, the world is abuzz with the emergence of Threads, Meta’s response to Twitter.
But what is Threads, and how does it set itself apart from Twitter? Join us as we explore this exciting new platform.
What Is Threads By Meta Platforms?

Threads is a social media and networking service brought to you by Meta Platforms, known for its heavyweights Facebook and Instagram. Much like Twitter, the service focuses on short-form text-based posts, but images, videos, and links are also supported. As you would expect, users can engage with posts through replies, reposts, and likes, making Threads a hub for conversations about trending topics.
Threads didn’t just appear out of nowhere, it has a fascinating backstory. When Elon Musk acquired Twitter in October 2022 and started stirring the social media pot with his changes, Meta employees huddled together to cook up an alternative. The initial idea was Instagram Notes, a text-based feature for Instagram. Soon after, they began to envision a separate, independent app focused on text, and that’s how Threads was born.
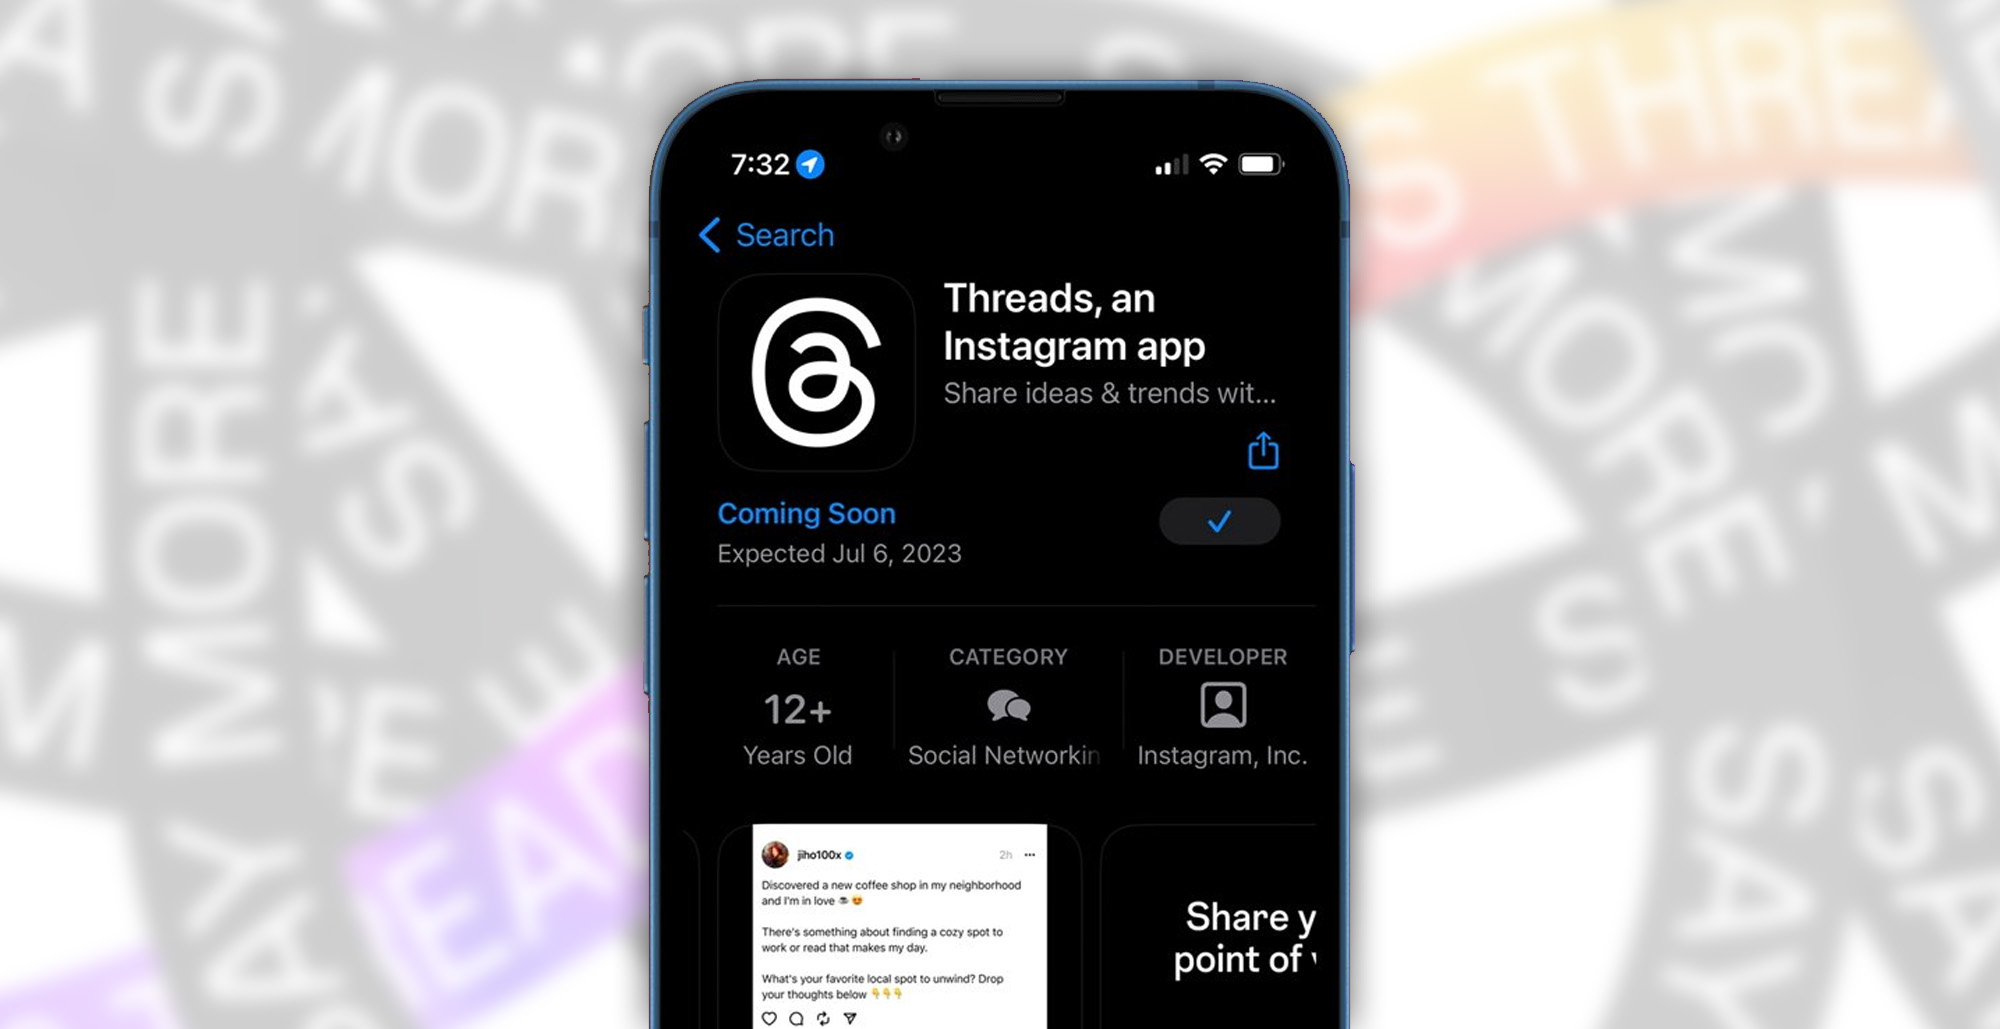
Developed under the codename “Project 92 (P92)”, the existence of this new platform remained under wraps until March. It then took another three months until Threads was released on July 6th in one hundred countries.
Very soon after its launch, Threads has shown that it’s a force to be reckoned with. In the first two hours, it pulled in a staggering 2 million users. By the time it crossed its fifth day, Threads had amassed an astounding 100 million users.
Even ChatGPT, known for its quick adoption, took two whole months to reach the same milestone. While Threads still has some way to go to surpass Twitter with its 350 million monthly active users, this initial surge is impressive, to say the least, and it will be interesting to watch if the moment lasts.
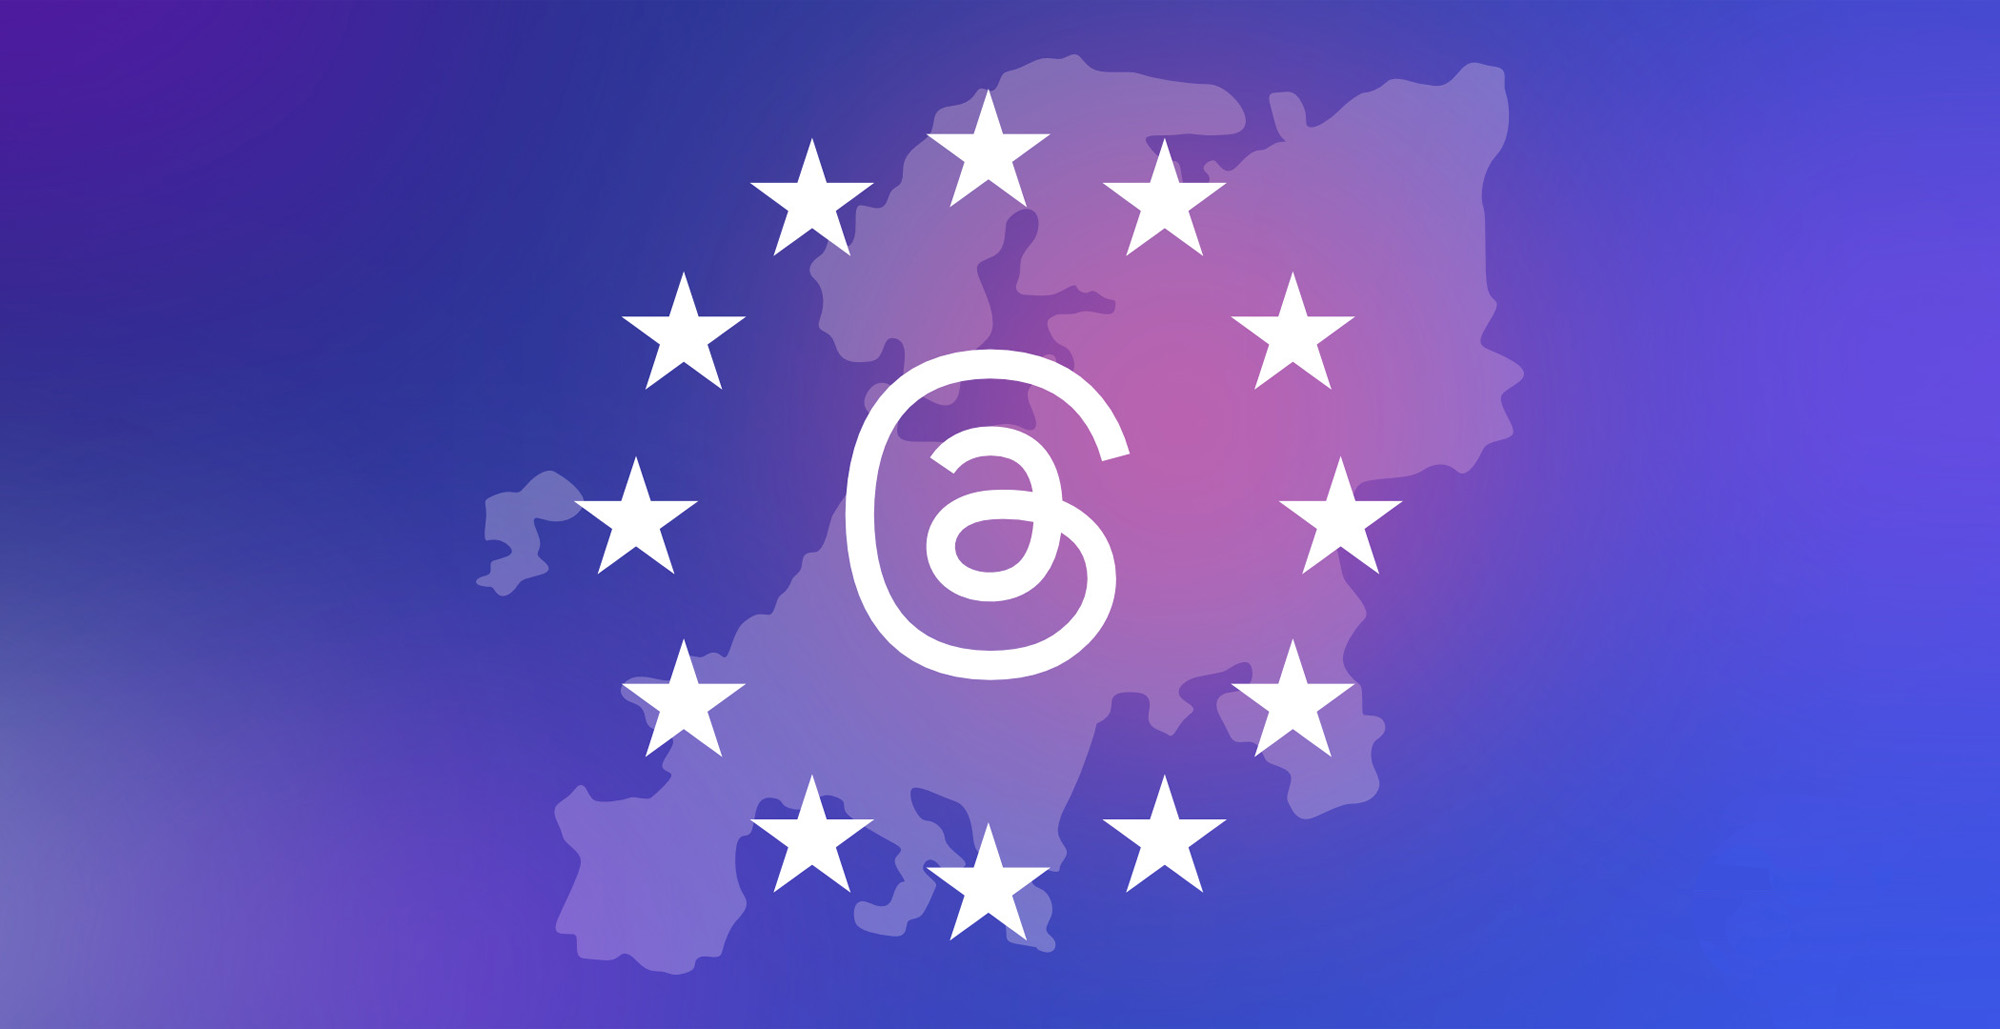
Where Is Meta’s Threads Available?
At the time of writing this article, Threads isn’t available everywhere. Notably, the platform has yet to land in the European Union. That’s because Meta doesn’t want to risk non-compliance with the EU’s Digital Markets Act.
The EU’s Digital Markets Act is an encompassing regulation that sets the rules for digital platform gatekeepers. These gatekeepers are platforms with a considerable impact on the internal market, serving as a crucial link between businesses and their end users. The purpose of this act is to ensure that these gatekeeper platforms do not impose unfair conditions on businesses and end users, as well as to maintain the openness of vital digital services.
Non-compliance with the Digital Markets Act could result in severe sanctions. For instance, the European Commission can impose fines up to 10% of the offending company’s total worldwide annual turnover, or up to 20% for repeated infringements. It can also impose periodic penalty payments up to 5% of the company’s total worldwide daily turnover. In case of systematic infringements, the Commission can take more drastic steps, such as obliging a gatekeeper to sell a business.
Besides the EU, Threads also isn’t available in Iran because the country’s government has blocked the platform, adding it to the country’s long list of censored social media platforms.
Surprisingly, Threads is available in China, and it’s currently trending there as one of the most downloaded social media apps, along with Sina Weibo, WeChat, Tencent QQ, Zhihu, Youku, TikTok, and others.
How To Access And Use Threads In Europe
So you’re in Europe and can’t wait to join the Threads conversation? Fortunately, there’s a way around the geo-restrictions. However, it requires a few additional steps.
iOS:
In order to access Threads on your iOS device from the EU or any other place where the social media service isn’t available yet, you’ll need to switch your App Store country to one where Threads is accessible. Here’s how:
- Start by opening your Settings app. Your Apple ID name should be displayed at the very top of the screen — tap on it.
- Scroll down until you find Media & Purchases and tap on it. A pop-up menu will appear at the bottom of your screen. Select View Account from the menu. It may prompt you to log in at this point.
- You’ll then see an option for Country/Region — tap on it. Note that if you have active subscriptions, you’ll be required to cancel them before switching countries.
- Confirm your decision to change your country/region. After selecting your desired country (one where Threads is available), you’ll be directed to the Terms & Conditions page. Give it a quick glance over and then hit Agree.
- The last step requires you to input a new billing address and payment method applicable to the country you’ve selected. Make sure to save your changes before exiting.
Note: Bear in mind that you’ll need a valid billing address and credit card for the country you’ve chosen. If you opt for the United States, for example, you’ll need an American billing address and credit card.
Android:
On Android, the process is quite different. Instead of altering your store settings, you can download the Threads APK file from a reputable third-party website, such as Uptodown, and install it on your device. Here’s your step-by-step guide:
- Visit Uptodown’s Threads download page at this link using your Android device.
- Tap the Download button to start downloading the Threads APK file.
- Once downloaded, locate the APK file in your device’s file manager and tap on it.
- If it’s your first time installing an app from a source other than the Google Play Store, your device might ask you to allow installation from unknown sources. Go ahead and allow it — it’s safe as long as you’ve downloaded the file from a legitimate source like Uptodown.
- After allowing installation from unknown sources, tap on the APK file again to install Threads on your Android device.
There you go! Now you can join the Threads revolution even if you’re in Europe.
Note: It has been confirmed that Meta that it is currently blocking users based in the EU from accessing the Threads app via VPN. Despite this, the above methods can potentially be used to access Threads once these restrictions are lifted. Also, you should be aware that circumventing region restrictions may violate the Terms of Service of the application, so proceed with caution.
How Does Threads Work?
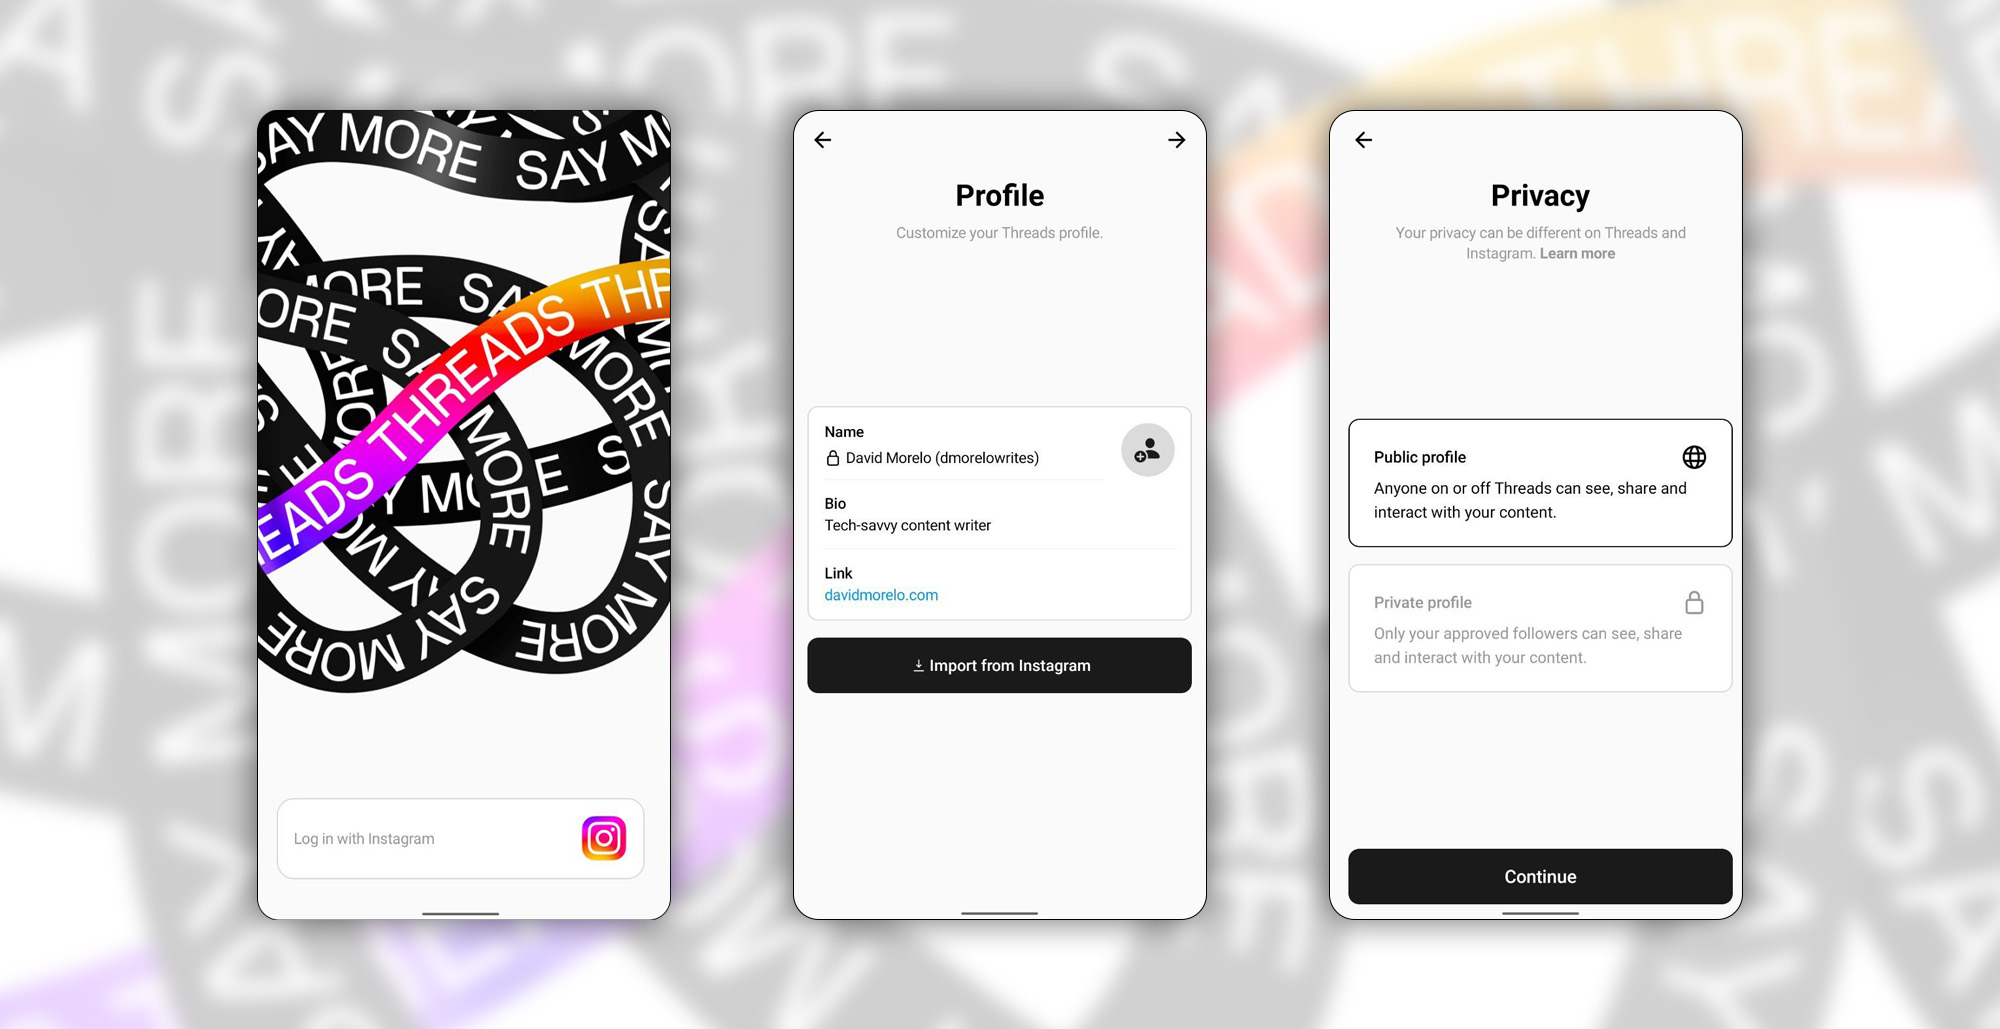
At its core, Threads is intimately connected with Instagram. If you’re one of the 1.6 billion Instagram users, you’re already halfway there. All you need to do is sign up with your existing Instagram account, or if you prefer, create a new one.
Upon signing up with your Instagram account, all your followers get transferred to Threads. This means you won’t have to start from scratch, re-finding friends or building up a new audience.
Once you’re in, you get to choose the level of exposure for your profile. Go public, and anyone on or off Threads can view, share, and interact with your content. Alternatively, choose a private profile, and only your approved followers will have access to your shared content.
The Threads app features five distinct tabs:
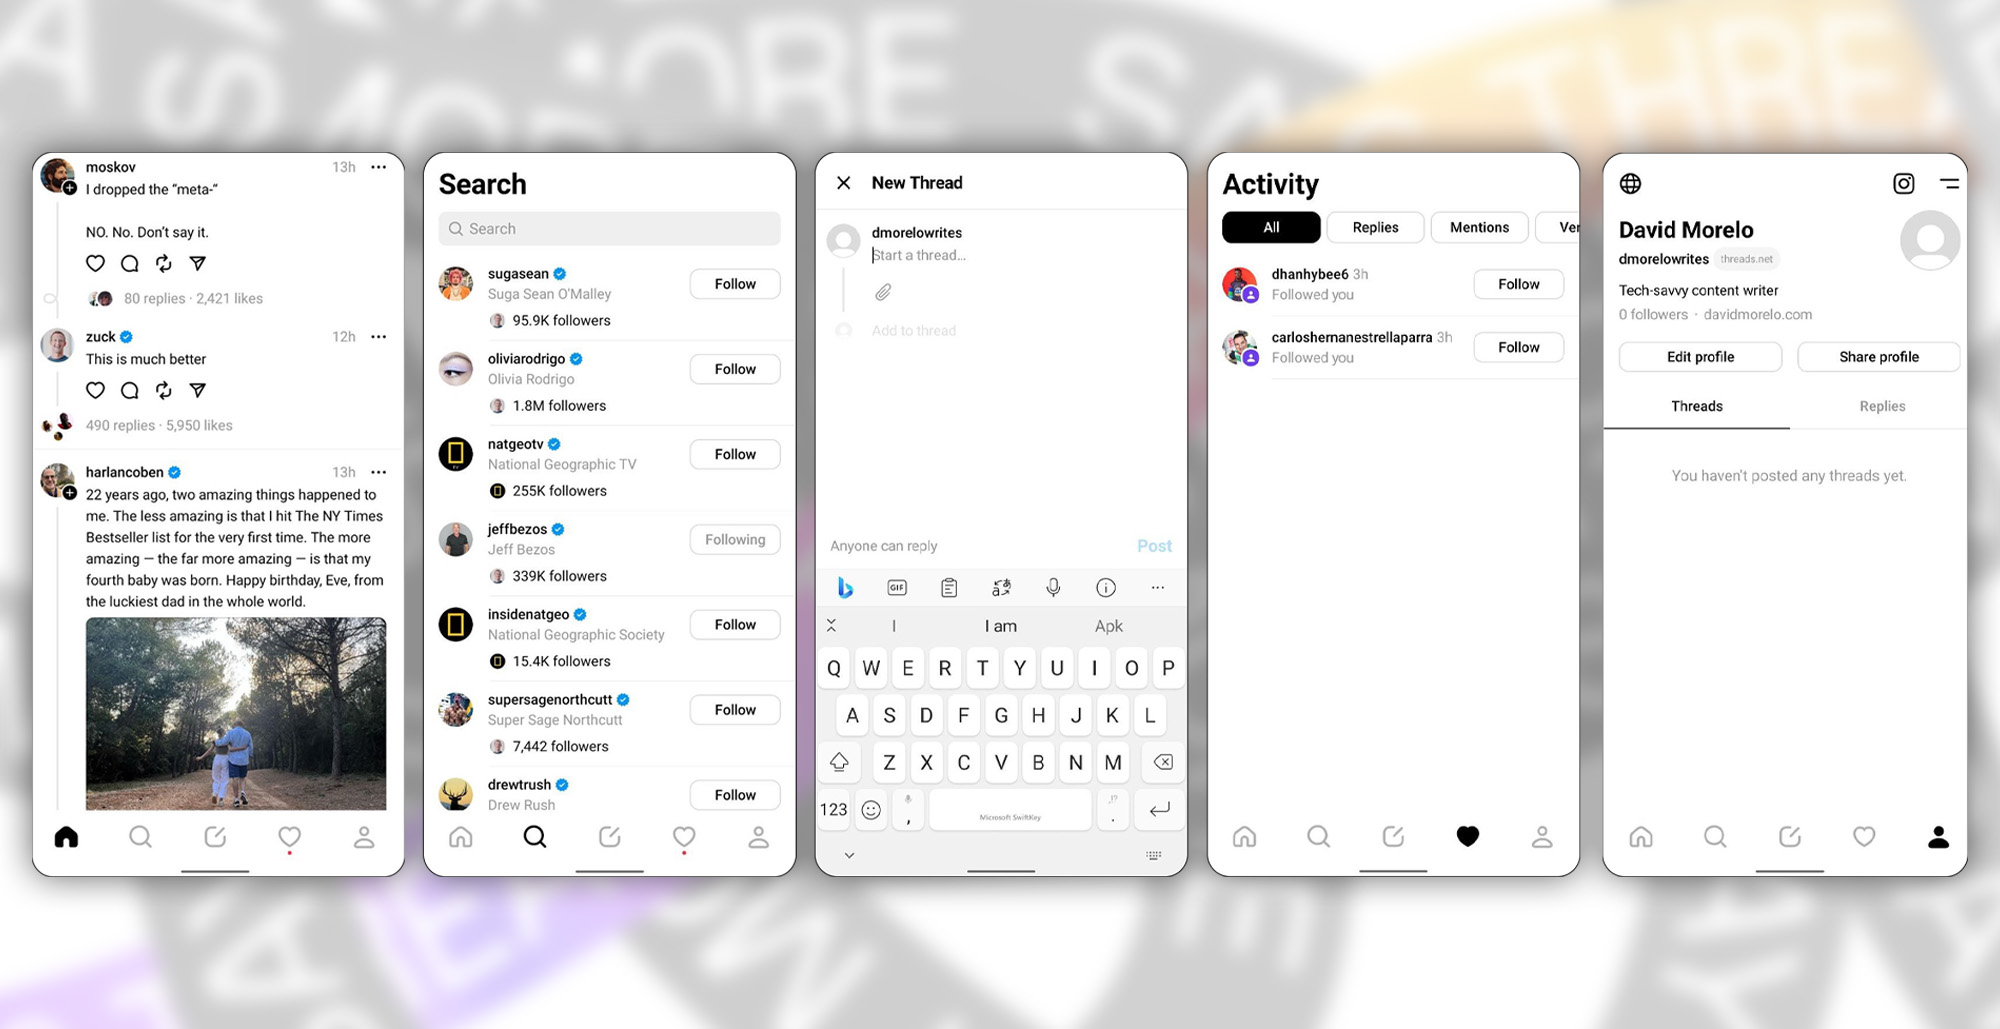
- Home: A mix of posts from people you follow, blended with algorithmically suggested content. Unlike Twitter, which allows toggling between chronological and algorithmic feeds, Threads currently supports only the algorithmic approach.
- Search: Here’s where you can discover new people to follow, broadening your Threads network.
- New Thread: Your creative space, where you can write a new thread and attach photos or videos. Threads offers a limit of 500 characters for text or 5 minutes for video content. This provides a slightly larger canvas than Twitter’s 280 characters or 2 minutes 20 seconds of video for regular users.
- Activity: A dashboard showing who’s started following you, who’s replied, mentioned you, and so on.
- Profile: A personal archive of your created threads and posted replies. You can edit your profile or share it with others from here.
While Threads doesn’t currently support some standard social media features, such as hashtags, trending stories, and direct messaging, a significant update is currently in the works.
As confirmed by Instagram boss Adam Mosseri, an alternative chronological feed is currently high on the priority list, responding to users’ demands to see posts from the accounts they follow in the order they were shared, rather than in the order determined by the algorithm. This will give users greater control over their home feed and what content they engage with.
Other features on the horizon include the ability to edit posts after they’ve been published and the introduction of multi-language support to make the platform more accessible to a global audience.
A particularly exciting development is the planned integration with the fediverse, a collection of interoperable social networks, all using common protocols, which allows users to follow and interact with each other across different platforms. This means that a user on one platform, say Mastodon, can follow, interact with, and share content from a user on another platform, like Threads, seamlessly. With the support for the fediverse, Threads users will have the opportunity to expand their network beyond the app itself, effectively creating a broader, more diverse social experience.
While Threads currently operates primarily through the mobile app, the company is also working on introducing a desktop interface to increase the platform’s usability across different devices.
What’s The Difference Between Threads And Twitter?
While Threads and Twitter might seem like birds of a feather, there are some key differences and similarities to consider.
The Goal
Twitter and Threads might seem to serve similar purposes at a glance, but their underlying goals and the experiences they aim to offer differ greatly.
Twitter is a platform that promotes public conversation. It’s a space where diverse voices can interact, share ideas, and challenge each other’s viewpoints. The platform is often driven by immediacy, with the latest news, trending topics, and viral posts capturing the spotlight. This dynamism can sometimes lead to an environment that feels confrontational, and at times aggressive, where users with different political views or ideologies may engage in heated, public debates.
The platform aims to offer a digital space that feels substantially less confrontational and aggressive than Twitter. Moreover, Threads is looking to strike a balance between Twitter’s text-centric approach and Instagram’s focus on visuals. Its feed seems to lean more towards promoting engagement rather than delivering breaking news.
Sign-Up Process
Twitter offers its users a flexible sign-up process where they can choose to create an account using their Google account, Apple account, or even their email. This provides convenience and flexibility for users who might already have these accounts, eliminating the need to create a new account from scratch.
On the other hand, Threads is less flexible in this regard. Threads users are required to sign in with an existing Instagram account or create a new one if they don’t already have it. This means that to use Threads, you must be part of the Instagram community, which can be limiting for those who do not wish to have an Instagram account.
Account Deletion
On Twitter, users can delete their accounts separately from the social media account they’ve used to sign up. his individual autonomy allows users to control their online presence and digital footprint on a platform-by-platform basis, providing a sense of security and privacy.
In contrast, Threads doesn’t afford its users the same level of autonomy. It’s currently not possible to delete a Threads account without also deleting the associated Instagram account. This has already caused a significant amount of frustration and controversy among users.
Features
Twitter offers a Direct Messaging (DM) feature, allowing private conversations between users. This opens a parallel line of communication that can be used for more personal or confidential discussions.
Additionally, Twitter has integrated several quality-of-life features, such as lists, bookmarks, and hashtags, that make the platform more enjoyable to use. Sadly, these and other features are currently missing from Threads.
Web Interface
Twitter has a robust web interface, allowing users to tweet, retweet, follow, and engage with content in much the same way they would on the mobile app. This has proven essential for users who prefer larger screens or simply like the option of using Twitter from various devices.
Threads, on the other hand, doesn’t have the same full-fledged user interface. Right now, it’s not even possible to create a new thread from the web — you can only view existing ones.
Decentralization
Threads is promising to support “decentralization” soon. This means that you’ll be able to interact with friends on other social networks supporting the ActivityPub protocol, such as Mastodon.
Despite various discussions and speculation in the digital community about the potential benefits of Twitter adopting a decentralized model, it doesn’t seem that Elon Musk or the other stakeholders at Twitter are interested in going down this path at the moment.
Pricing
When it comes to pricing, Threads and Twitter have distinct models. Threads operates on a completely free basis, meaning that all users have access to the same features without any premium tiers or subscription plans.
Since July 2022, Twitter has been offering a subscription service called Twitter Blue, in addition to its free access. Twitter Blue, priced at $8/month or $84/year, offers a host of premium features designed to enhance the user experience. These include the ability to undo tweets before they’re sent, edit tweets after posting, group saved tweets, and more.
Conclusion
Threads, Meta’s answer to Twitter, is a rising star in the social media space. With a promising start and a unique take on the Twitter formula, it’s looking to create a less confrontational environment than its main competitor. But like most young platforms, Threads still has to address some user concerns, such as the lack of certain features. Only time will tell whether Threads has what it takes to dethrone Twitter, but its current steep growth and user adoption indicate that it has struck a chord with many people.

DJI Teases Dual-Camera Osmo Pocket 4P For 2026 Launch

Lebanon Ministers Meet Visa Over National Digital Payment Platform

AltoVolo Releases Sigma Footage & Sets Date For Demonstrator

Careem Launches Lebanon Aid Drive With WFP

United Arab Emirates To Quit OPEC After 59 Years

Deezer Says AI Tracks Now Make Up 44% Of Uploads

Yango Ride Introduces In-Chat Trip Planning In ChatGPT

NVIDIA Puts GPT-5.5 Codex In Hands Of 10,000 Staff

YouTube Tests Conversational AI Search Tool


Divya
January 31, 2025 at 9:26 AM
Thank you for this helpful guide! I had no idea how to check for pending Instagram follow requests, and the data download method is especially useful for a more thorough approach. Appreciate you sharing this!