Social Media
How To Lock Your Facebook Profile (From Mobile & Desktop)

Facebook has received a lot of criticism in recent years for its lackluster approach to user privacy. Hoping to improve its image, the social media powerhouse has been experimenting with a whole host of new privacy features, and one of them is an option that allows users to lock their profiles and show only limited information to people they are not friends with on Facebook.
Note: This feature is not yet available across all regions. If you’re unable to lock your Facebook profile after following our step-by-step instructions, then you most likely aren’t doing anything wrong.
How To Lock Your Facebook Profile Via Mobile App
Here’s what you need to do to lock your Facebook profile using the mobile version of the Facebook app:
- Launch the Facebook app on your mobile device.
- Tap your Facebook profile icon (located left to the “What’s on your mind?” input bar).
- Tap the three horizontal dots (located right to the “Add to Story” button).
- Tap the Lock Profile option.
- Read the information about how the profile lock feature works and confirm your decision to lock your profile.
At the moment, only Android users can lock their Facebook profiles via the Facebook app. If you’re an iOS user and don’t have access to an Android smartphone, you can follow the instructions below to learn how to lock your profile from any web browser.
How To Lock Your Facebook Profile Via Desktop
While there’s no way to currently lock a Facebook profile from the regular desktop version of the social media site, there’s nothing stopping you from accessing the mobile version of Facebook using any major web browser and locking your profile that way:
- Go to https://m.facebook.com/ (the “m” at the beginning of the URL will take you to the mobile version of the site).
- Click your Facebook profile icon (located left to the “What’s on your mind?” input bar).
- Click the three horizontal dots (located right to the “Edit Profile” button).
- Select the Lock Profile option.
- Read the information about how the profile lock feature works and confirm your decision to lock your profile.
Also Read: How To Find & Cancel Pending Facebook Friend Requests
To unlock your Facebook profile, simply go through the steps again but select the unlock option after you click the three horizontal dots.


Social Media
How To Find & Cancel Pending Instagram Requests
This step-by-step guide will show you how to find and cancel all those pending Instagram requests that people have ignored.

Accidentally sending a follow request to the wrong person on Instagram can be a potentially embarrassing mistake. As these mistakes rack up over time, you could eventually find yourself with dozens of unapproved follow requests. The good news is that Instagram allows you to cancel pending follow requests as long as you meet one obvious condition: The person you’ve sent the request to has not accepted or declined it yet.
How To Find Pending Instagram Requests
Unfortunately, the Instagram app (or the website) doesn’t offer a direct way to view pending follow requests. That said, users have two alternative options: a quick but potentially unreliable method, and a more comprehensive but time-consuming approach.
The quick method involves checking your search history for recently requested profiles:
- Tap the magnifying glass icon at the bottom of the Instagram app.
- Tap the search bar at the top.
- Tap See all to view your search history.
- Look for profiles with a Requested button.
This method is fast but limited. It only shows recent searches and won’t work if you’ve cleared your search history. The good news is that there’s also a clever workaround that lets you dig up all your pending follow requests by downloading your Instagram data. Here’s what you need to do:
Step 1: Access Your Instagram Account Center
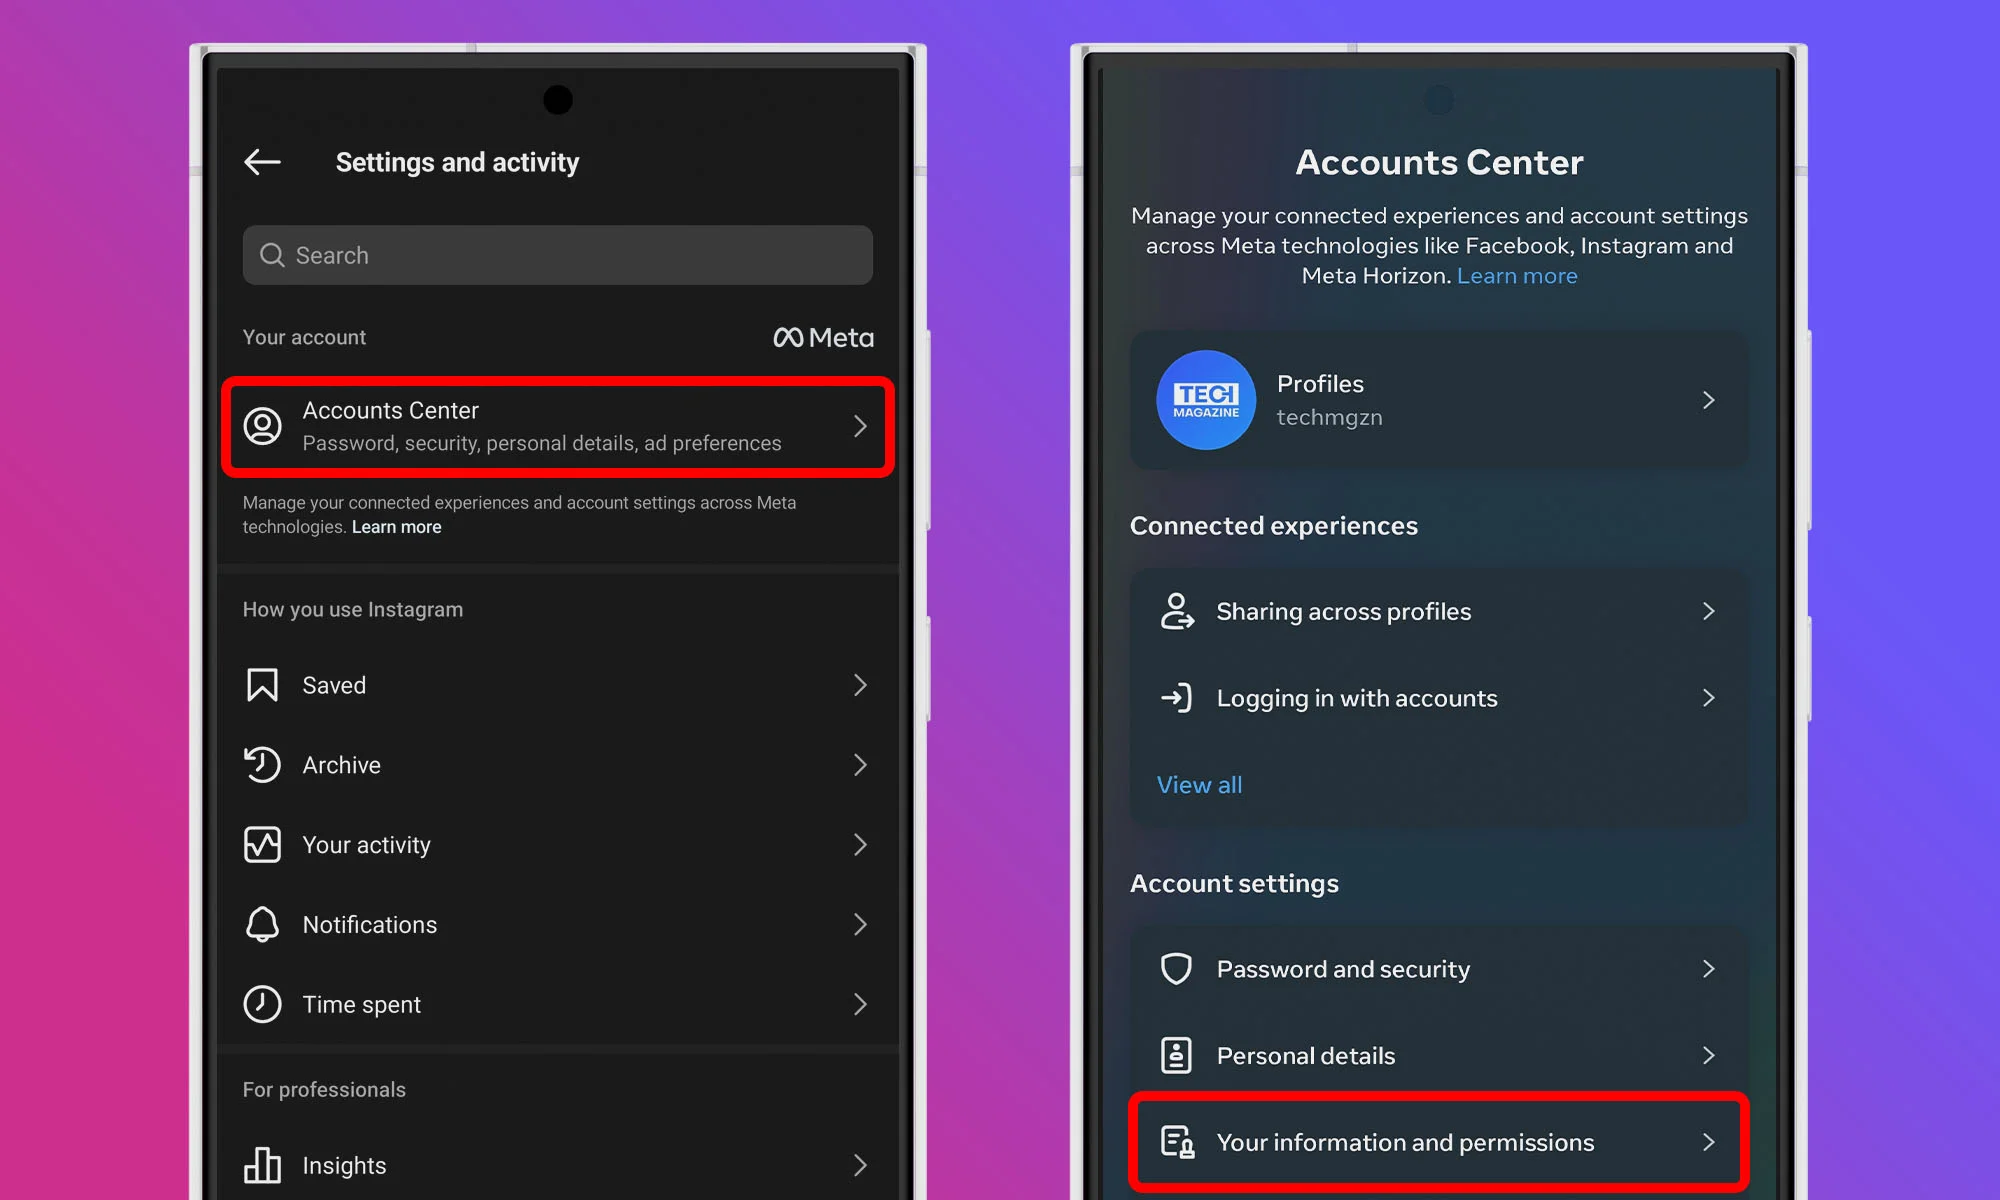
Start by opening the Instagram app on your mobile device and navigating to your profile by tapping your profile picture icon at the bottom right corner. Once you’re on your profile page, tap the three horizontal lines at the top right to open the menu. From there, select Account Center at the top of the list. Within the Account Center menu, navigate to the Your information and permissions section. There, select Download your information.
Step 2: Request A Download Of Your Information
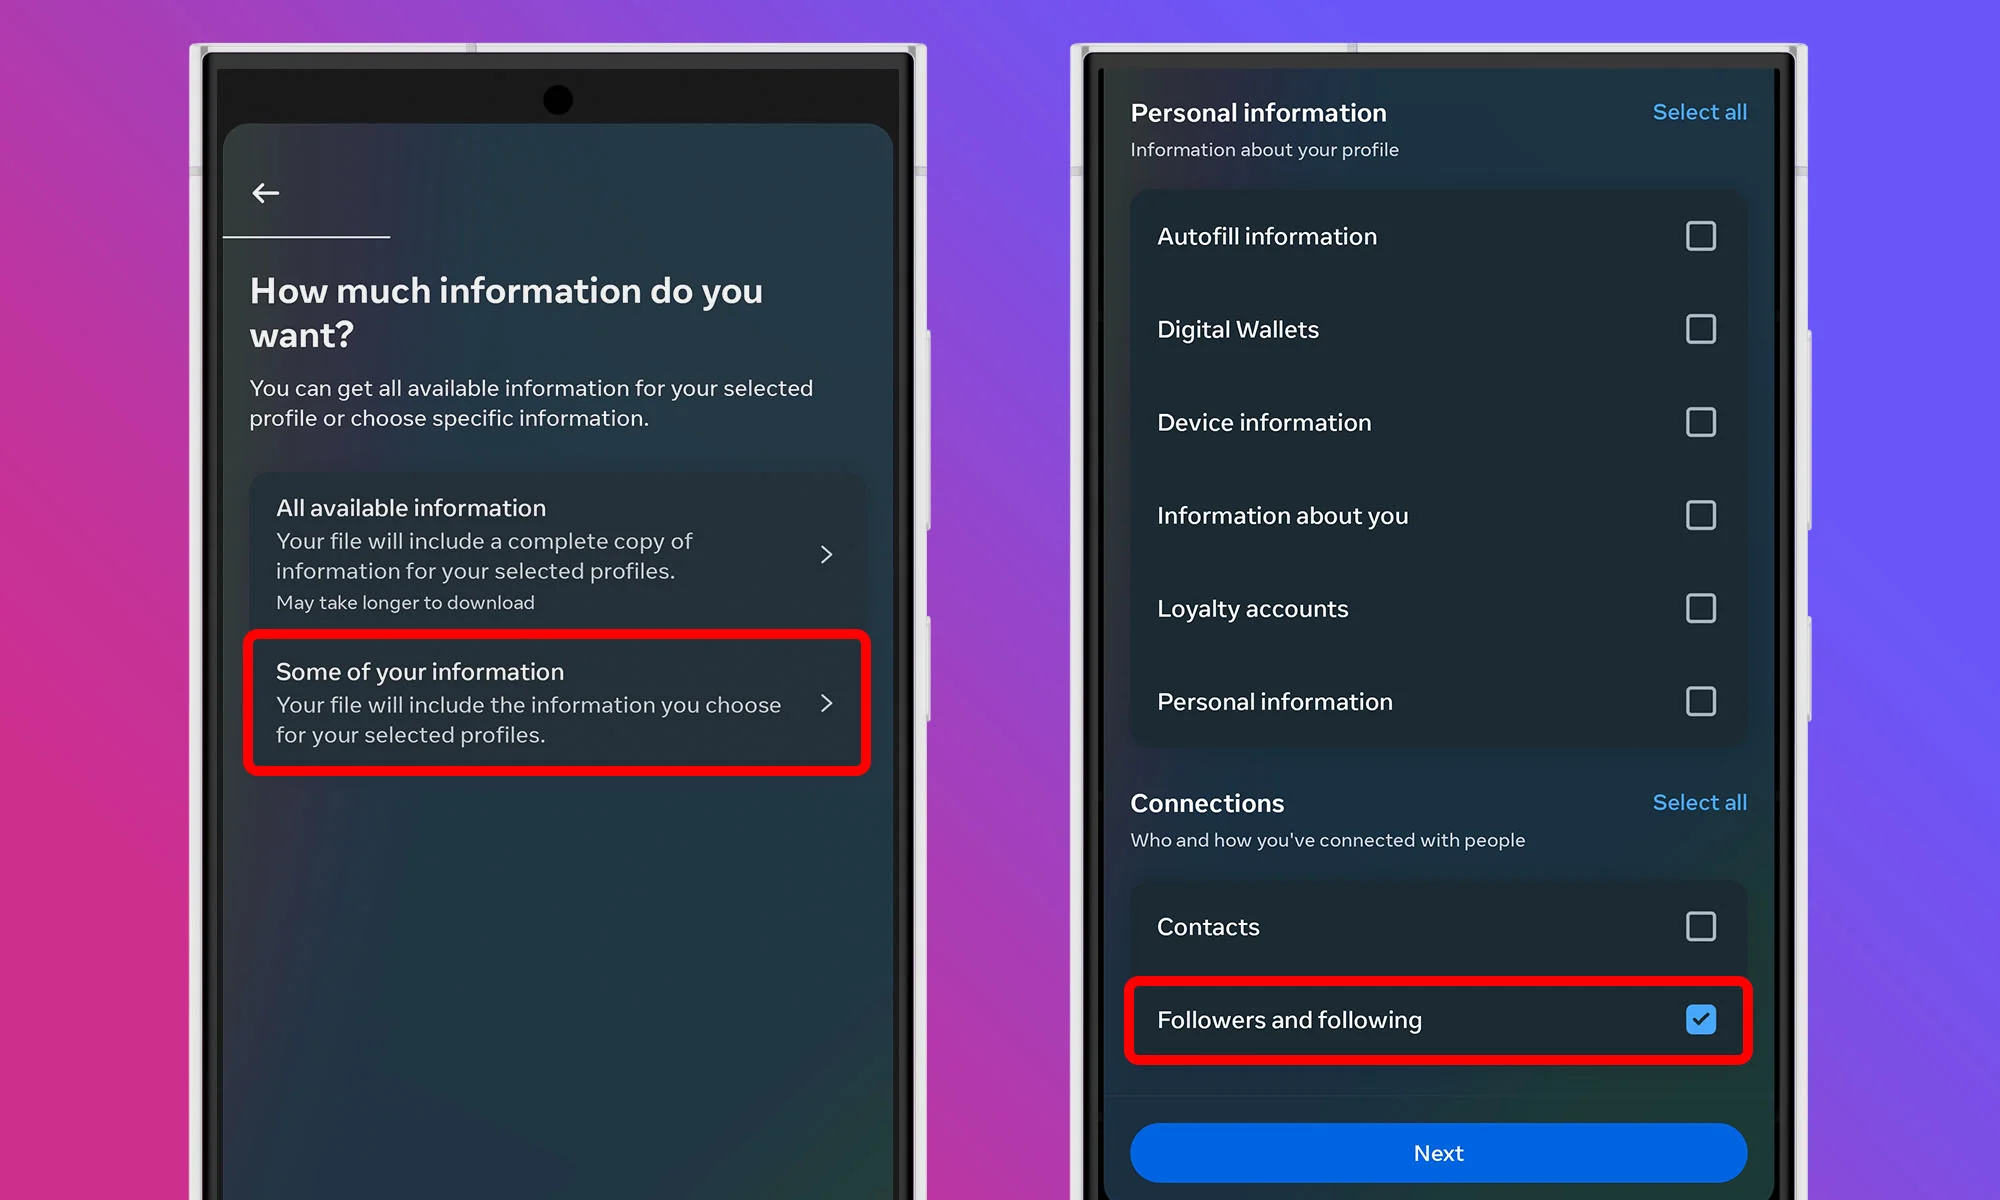
The Download your information feature allows you to request a copy of all the data Instagram has collected about your account. Don’t worry — this is a standard feature designed to give users control over their own data. Tap the Download or transfer information button. When asked how much information you want to download, select the Some of your information option. In the list that appears, find the Connections section and check the box next to Followers and following. This way, you’ll receive only relevant data.
Step 3: Set A Date Range And Submit Your Request
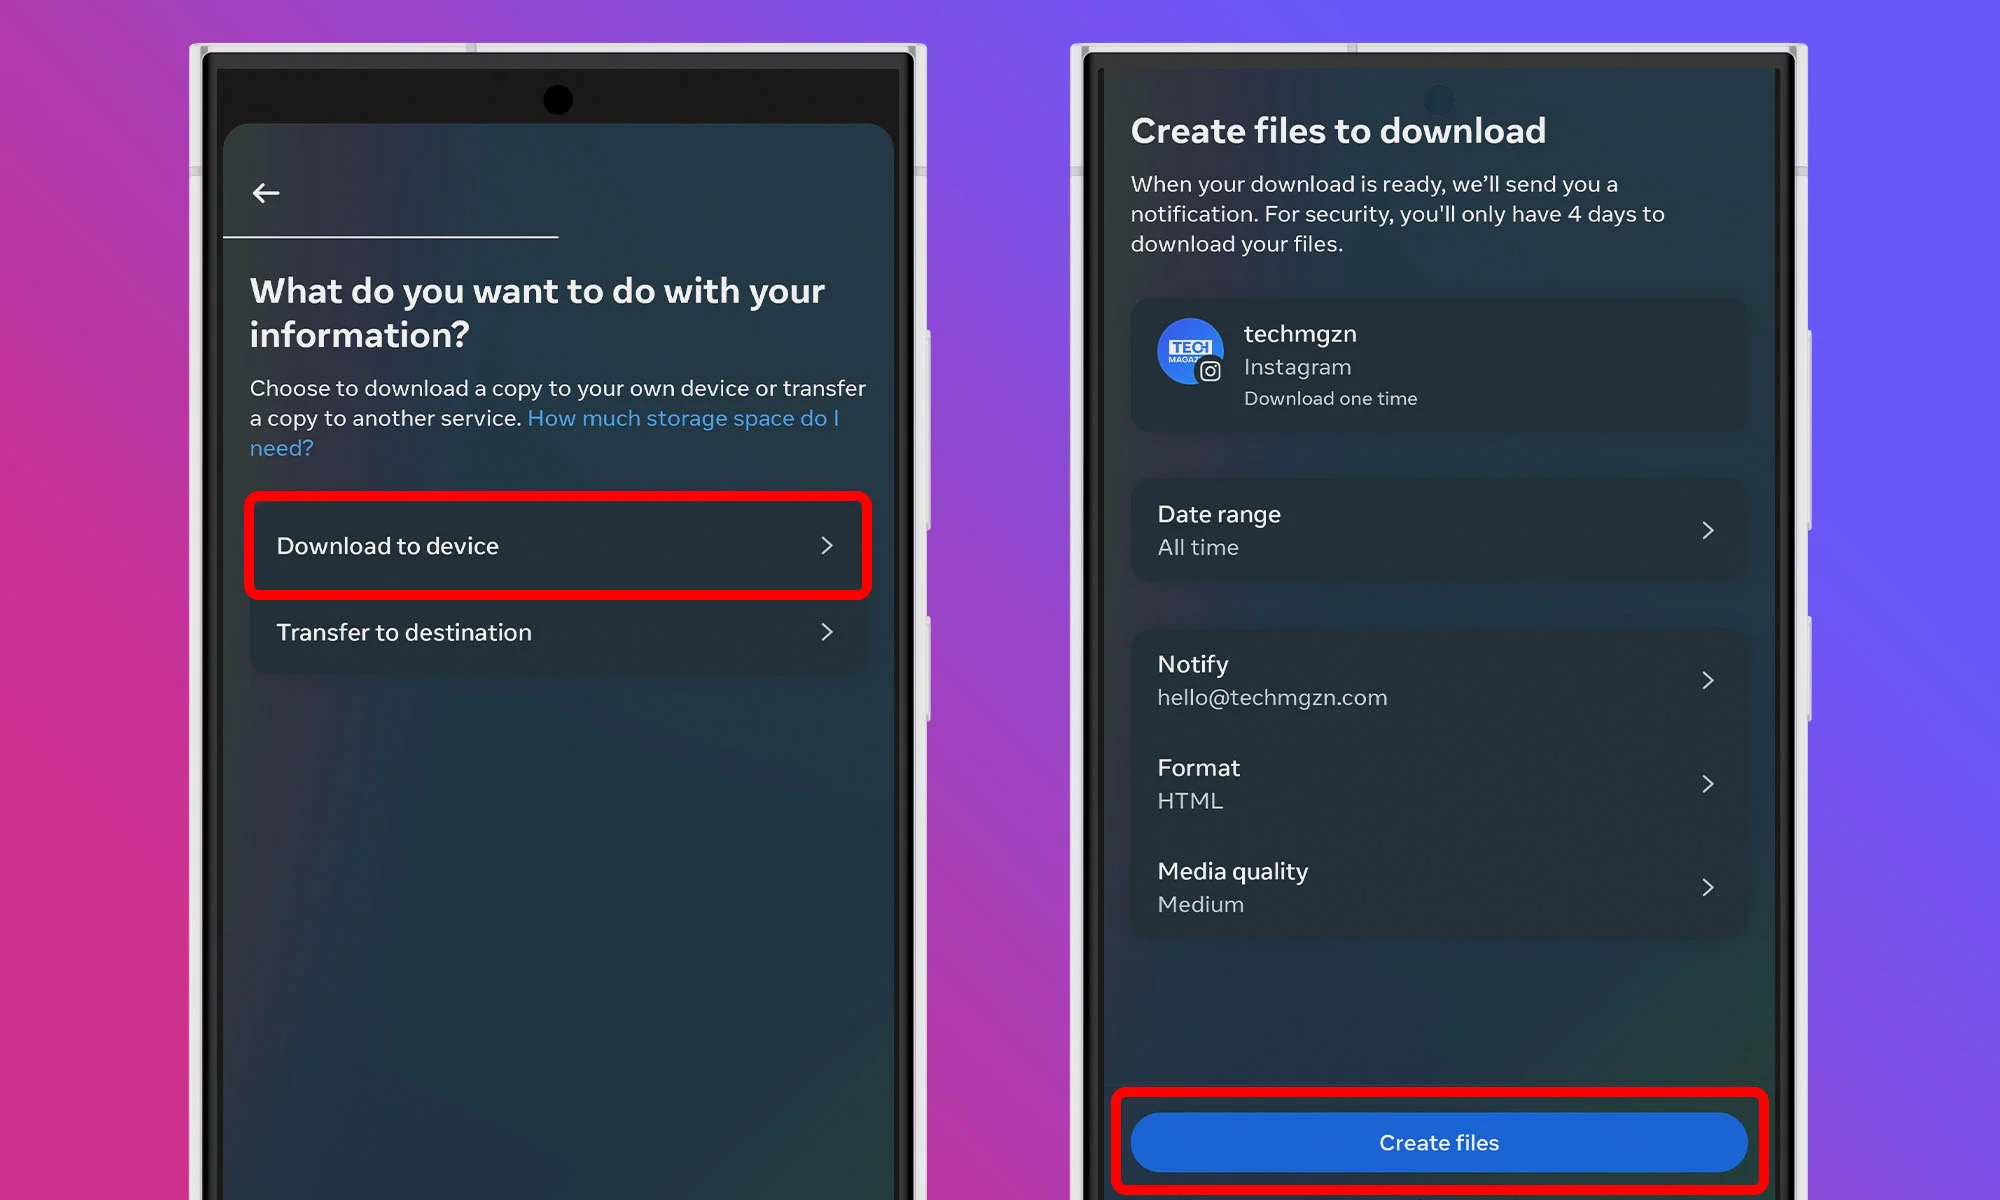
After selecting the data type, tap Next and choose to download the data to your device. You’ll have the option to set a Date range. If you want to see all pending requests since you joined Instagram, choose All time. Otherwise, select a specific time frame that suits your needs. Once you’ve made your selection, tap on Create files. Instagram will begin compiling your data.
Step 4: Wait For The Download Link
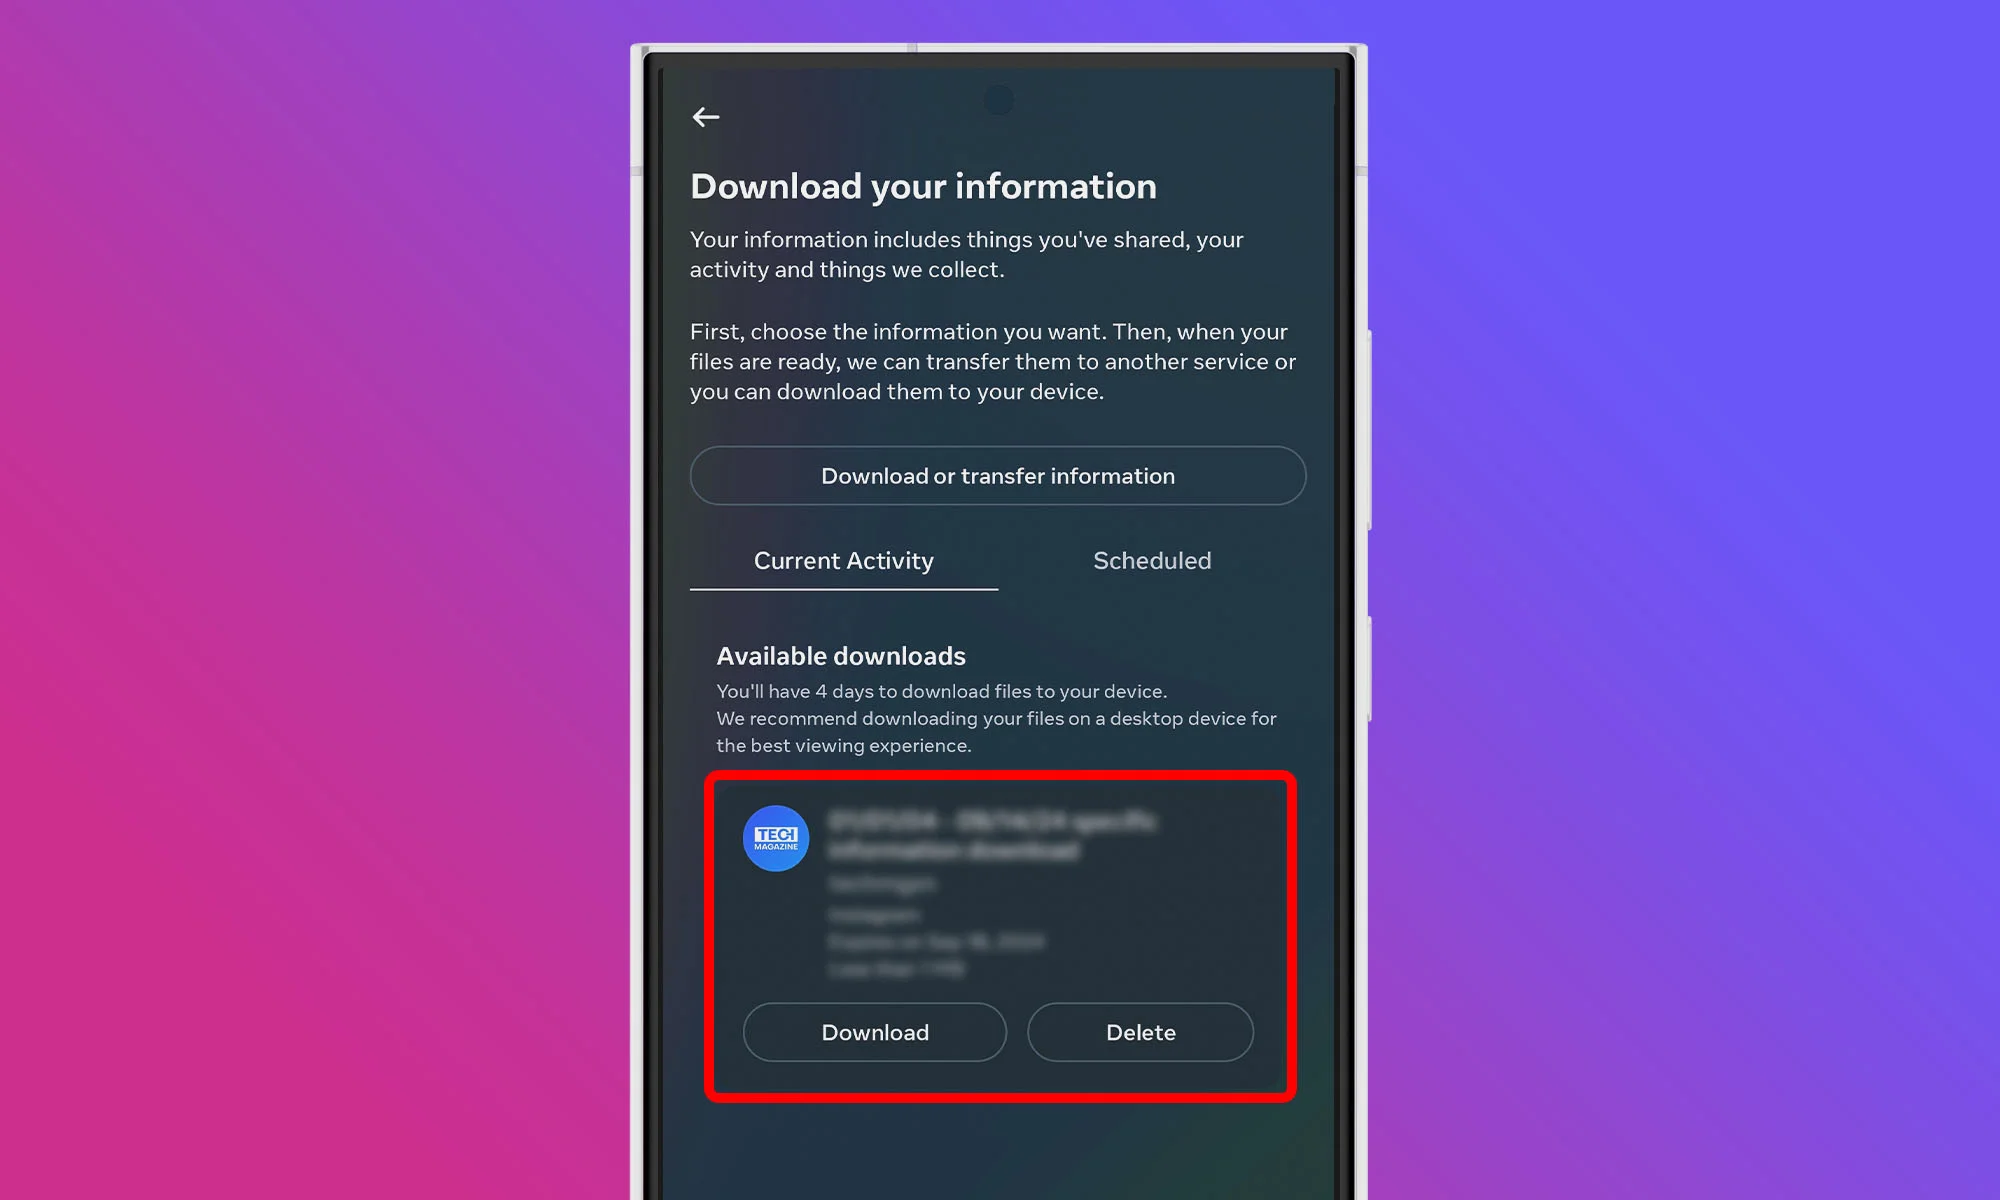
Instagram will process your request and send a download link to your registered email address. This might take anywhere from a few minutes to up to 48 hours, depending on the amount of data. Keep an eye on your inbox for an email titled “Your Instagram information“. Once it arrives, click on the Download information link provided in the email. You can do this on your mobile device.
Step 5: Extract Your Instagram Data
Your Instagram data will be downloaded as a ZIP file, and you need to use a file manager or extraction tool to extract its contents. You can now open the extracted folder using a File Manager (the Files app on iOS works nicely), look for a file named “start_here.html” and open it in your web browser. Find and click on Pending follow requests, and voilà! You’re now looking at a comprehensive list of all the follow requests you’ve sent that are still in limbo.
How To Cancel Sent Instagram Requests
Now that you’ve unearthed your pending follow requests, it’s time to clean house. Unfortunately, Instagram doesn’t offer a one-click solution to cancel all your pending requests at once, so expect the process to take a while, especially if you’ve sent a lot of follow requests.
Step 1: Locate User Profiles
For each pending request you want to cancel in the Pending follow requests section of the “start_here.html”, you’ll need to locate the user’s profile on Instagram. The quickest way to do this is by copying the username from your downloaded list and pasting it into the Instagram search bar. Once you’ve found the account, tap to enter their profile.
Step 2: Cancel The Follow Request
Look for the Requested button on their profile. This button is your target. When you tap it, it should immediately transform back into a blue Follow button. This visual change confirms that you’ve successfully cancelled your follow request.
Step 3: Repeat The Process
Now, rinse and repeat this process for each pending request you want to cancel. As you go through this process, you might find some accounts you still want to follow. In that case, simply leave the Requested button as is. Who knows? They might accept your request someday.
Also Read: How To Permanently Delete Your Instagram Account
As you can see, finding and cancelling Instagram follow requests isn’t complicated – you just need to know where to look. If you found this guide useful, let us know in the comments below. Also, make sure to follow us on Instagram!

Samsung’s Galaxy Watch 9 And Ultra 2 Specs Leak Ahead Of Unpacked

TikTok Hopes Labels And Literacy Will Tame AI-Generated Content

A Three-Clinic Network Bets Dubai Is Ready For Longevity Medicine

YouTube Rolls Out Supervised Children’s Accounts Across MENA

Meta’s New AI Tool Builds Images From Public Instagram Photos

Can AI Save Your Relationship? This New “Wingman” App Thinks It Can

WhatsApp Usernames Are Coming: Here’s How To Claim Yours

Dubai Certifies The World’s First Purpose-Built Air Taxi Vertiport
Meta’s New AI Tool Builds Images From Public Instagram Photos

OpenAI Cleared To Launch GPT-5.6 Publicly After Government Review


-

 News2 months ago
DJI Teases Dual-Camera Osmo Pocket 4P For 2026 Launch
-

 Web32 months ago
2026 Crypto Trends: Bitcoin, ETFs & The Future Of Payments
-

 News2 months ago
Lebanon Ministers Meet Visa Over National Digital Payment Platform
-

 News2 months ago
At I/O 2026, Sundar Pichai Concedes AI Must Deliver Real Value